Vultr is an Unmanaged Cloud hosting service. However, deploying a server and installing WordPress is easy and straightforward. It’s a matter of minutes to get your server WordPress ready on Vultr.
In this tutorial you will go through:
- What Choose Vultr?
- Why Choose Vultr?
- A step-by-step guide to installing WordPress on Vultr.
- Point your domain name to the server.
- Install a free SSL certificate.
If you have an existing WordPress site and want to migrate it to Vultr, read this guide.
What is Vultr?
Vultr is a global cloud hosting service that provides reliable and high-performance hosting solutions.

With 32 server locations around the world, it’s one of the largest worldwide networks, enabling you to easily deploy cloud infrastructure solutions no matter where your customers are.
Vultr pricing starts at as little as $2.50 per month. For this amount, you get a cloud VPS server with the necessary resources you need.
Why Choose Vultr?
- Vultr is a cloud hosting service: Which means better performance and uptime, and less cost.
- Low pricing: Since it’s a cloud hosting service, the running and maintaining costs will be reduced. Thus the server cost will be reduced.
- Pay as you go: You will not pay upfront, you will be charged at the end of your month for the resources you consumed. If you created a server for 7 days and deleted it, you will be charged for the 7 days only.
- Over 30 data centers: You can deploy your servers and apps in lots of server locations around the world.
- Easy to set up and use: Especially if you are a beginner, Vultr is easy to navigate through and create instances and apps.
- Latest Technology: Vultr uses the latest hardware pieces on the market like the latest AMD and Intel CPUs.
Step 1: Sign up for Vultr
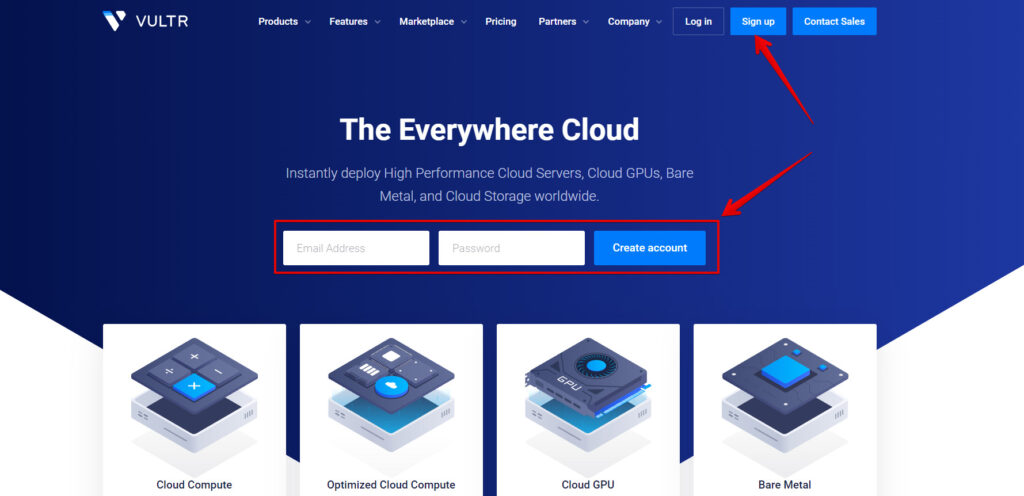
Go to Vultr.com. Use this link to get $100 free credit to test their service. the credit will be applied to your account once you sign and add a valid payment method and will expire in 14 days.
When you land on the Vultr home page, add your email and new password and click Create account, or click on Sign up at the top bar.
When you click on Sign up, you will have the option to sign up via your email, or via Google or GitHub.
Choose the one you like and proceed to the next billing page where you should add a payment method.
There are five payment methods Vultr supports, they are Credit Card, Paypal, Crypto, Alipay, and Wire Transfer. You can also see the free credits appear on the right side after you use our link provided above.
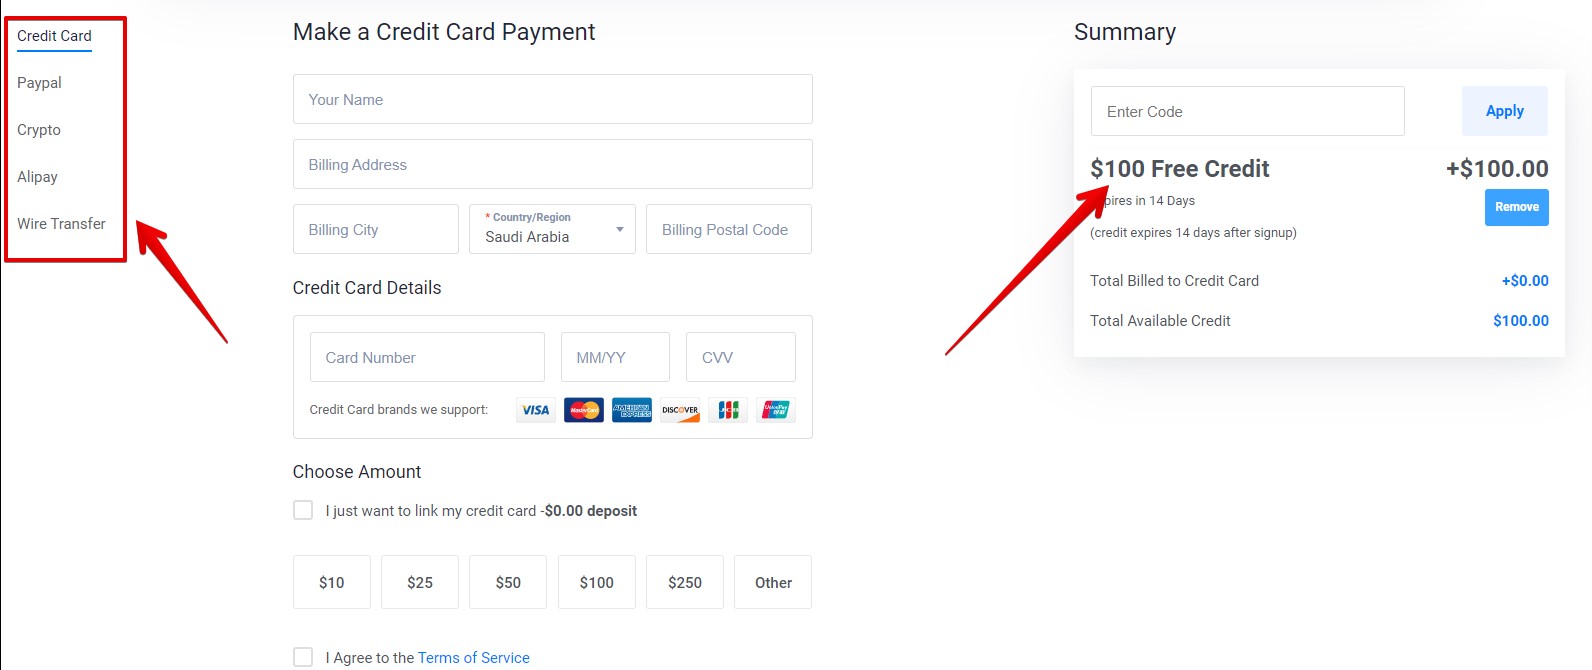
To ensure that your payment method is eligible, Vultr deducts at least $10 from your payment method and deposits it into your account for future use.
After you verify your payment, you will see on your billing page the $100 free credit along with the $10 that you paid for verification.
Once you choose the suitable payment method and agree to the Terms of Service, proceed to checkout.
Lastly, verify your email address if you used your own email to sign up for Vultr. Go to your email inbox, open the Vultr verification email, and then click Verify Your E-mail.
Now you are one of Vultr’s customers, let’s move on to step three of how to create and install a WordPress website on Vultr cloud compute.
Step 2: Deploy an Instance and Choose WordPress
In this step, we will create a server (instance) and install WordPress on top of it.
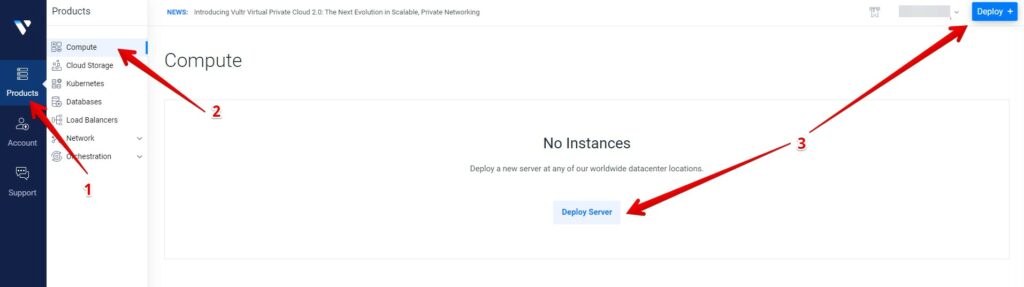
1. Go to Compute:
To create an instance on Vultr go to Products > Comppute > and click on Deploy.
Here are the steps for deploying a new server and installing WordPress on the Vultr instance:
2. Choose the server type:
Vultr offers 4 types of servers you can choose from. They are:
- Optimized Cloud Compute: For more demanding apps such as production websites, CI/CD, and video transcoding.
- Cloud Compute: Cloud VPS servers share the same physical CPU environment with dedicated resources such as RAMs, Cores, Bandwidth, and Storage space.
- Cloud GPU: For apps demanding more such as AI, machine learning, and data analytics.
- Bare Metal: Physicla dedicated server. Nnon-virtualized machine.
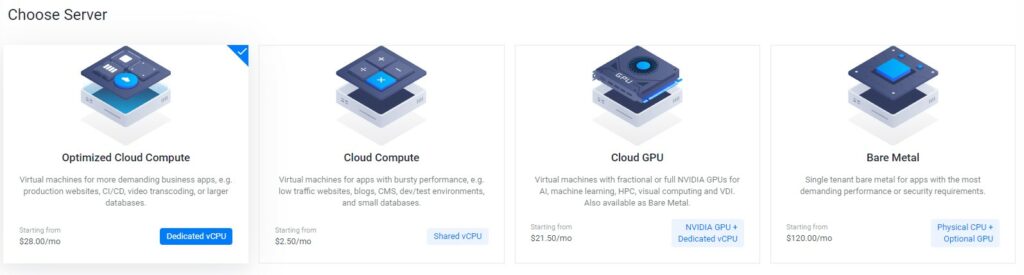
Essentially, what we are aiming for is a cloud VPS server, a shared environment with dedicated resources, so I will go with the Cloud Compute option.
3- Choose the CPU & storage technology:
When you choose the Cloud Compute option, you will be shown four types of cloud VPS servers, these are:
- AMD High Performance: Powered by the latest generation AMD EPYC CPUs and NVMe SSD.
- Intel High Performance: Powered by the new generations of Intel Xeon CPUs and NVMe SSD.
- High Frequency: Powered by the 3GHz+ Intel Xeon CPUs and NVMe SSD.
- Regular Performance: Powered by the previous generation Intel CPUs and regular SSD.

All types can do pretty well for websites with normal needs. However, from our tests, we found that the High Frequency performs the best. AMD High Performance is in the next place.
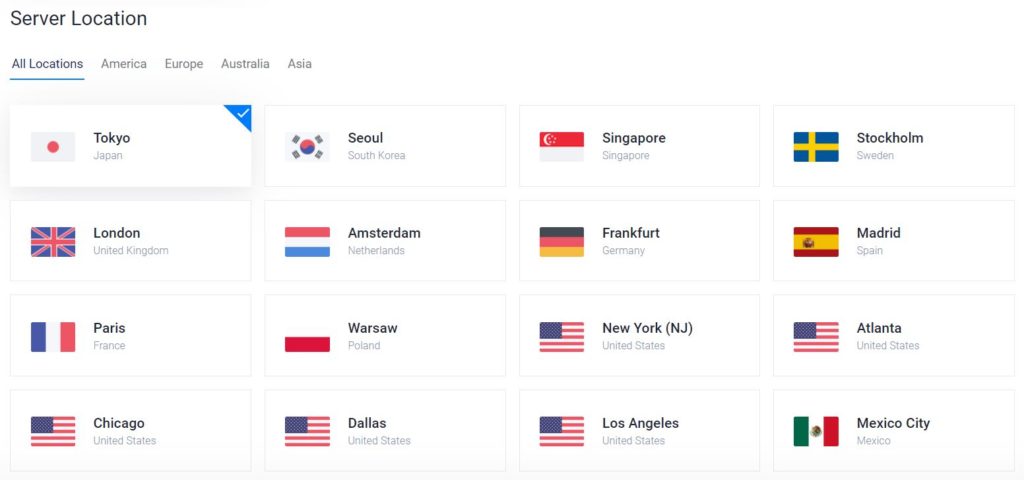
4- Choose the server location:
From over 30 data centers around the world that Vultr has, choose the closest location to your potential customers.
The closer your website is stored, the faster your server can receive and fetch data and content to your website visitors.
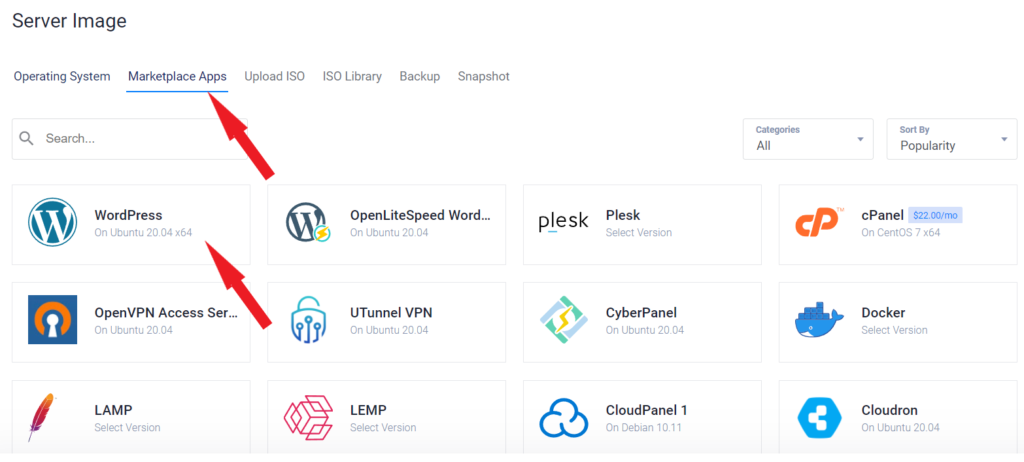
5- Select WordPress:
Under Server Image go to Marketplace Apps and search for WordPress using the search box. Select WordPress On Ubuntu and head down to the next step.
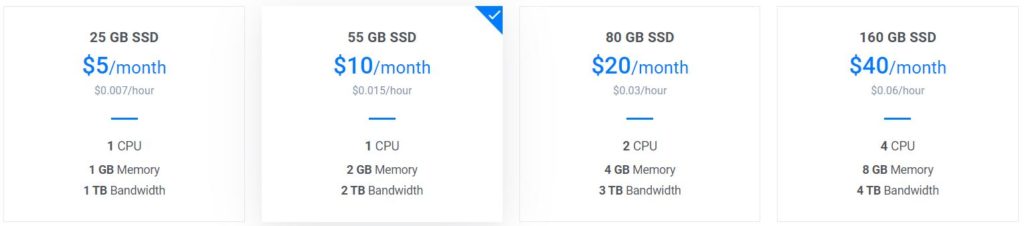
6- Choose the server size:
The server size is the resources you want your server to acquire. Choose the one that suits your website needs.
If you don’t have an idea of what server size you need to choose, or your website is below 10K visits/month, choose the $5 or $6/month plan. You can always scale up later.
7- Enable auto backups:
This feature is essential, as it ensures your website’s safety. You will be able to revert to an older backup if anything wrong happens, like cyber attacks, malware, or wrong configuration.
This will add an extra 20% of the server cost.
8- Add server hostname & label:
This is to categorize servers on your Vultr dashboard. Enter a name and a label for your server to recognize it later among other servers on your account.
At the end of the page, you will be shown a Summary of your server cost. Check everything is set up and click Deploy Now.
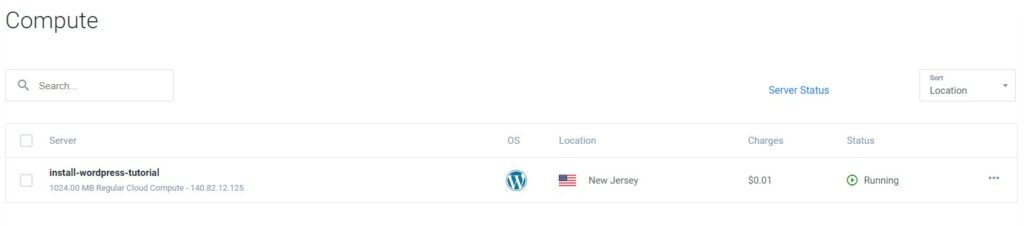
Wait a few minutes to let Vultr configure the server for you. Once this is done, you will see the status of the server updated to Running.
You will find the servers that have been created in the instances tab. just like the one I created in this tutorial.
Step 3: Complete the WordPress Installation
To complete your WordPress installation, you need to log in to your WordPress admin panel.
1. Access your WordPress site:
To log in to your WordPress admin dashboard enter (http://your server IP address/wp-admin/) in your browser just like this one: (http://207.148.88.173/wp-admin/). You can copy your server IP address from the server overview.
Or click the link that Vultr provides in the server overview under WordPress server details.
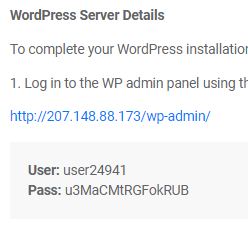
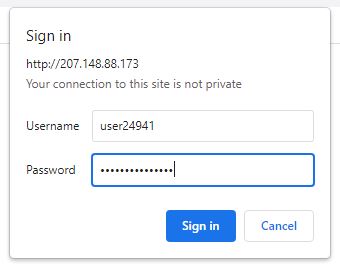
Once you do that, it will redirect you to your WordPress installation where you have to enter the username and password.
Copy the username and password that Vultr randomly created beneath the WordPress Server Details and paste it into the empty fields
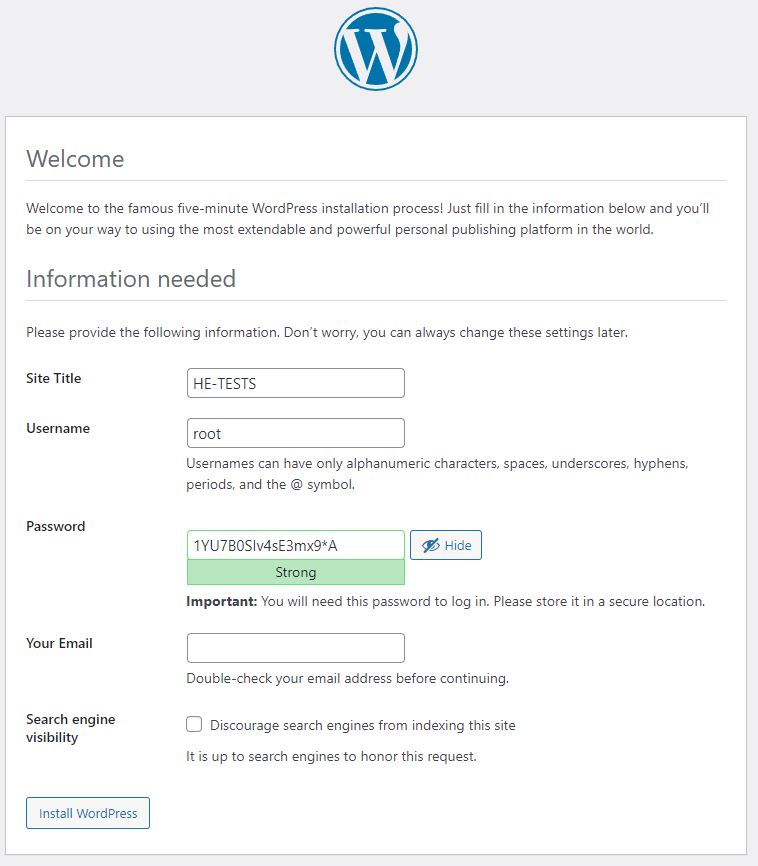
Next, Choose a language.
Next, enter new credentials for your WordPress website site title, username, new password, and your emails. fill in your information and click Install WordPress.
To access your WordPress admin panel click login and enter the username and password that you just created then click Log in.
2. Associate your domain with WordPress:
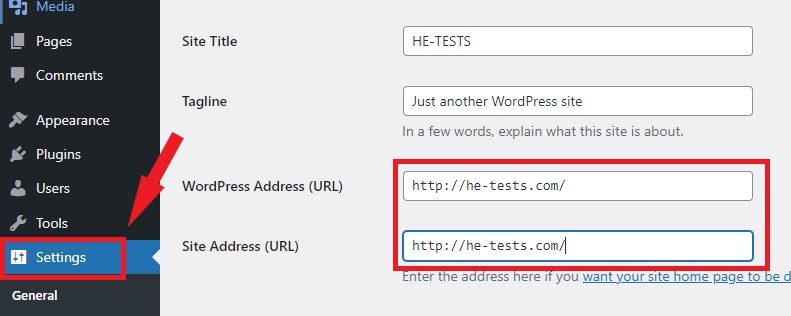
From your WordPress Admin main panel go to Settings > General.
Instead of your server IP address, enter your domain name in both “WordPress Address (URL)” and “Site Address (URL)” in your WordPress dashboard.
Next, scroll down to the bottom and click Save Changes.
Step 4: Point Your Domain Name to Vultr
Now you need to point your domain name to your WordPress website so that whenever someone types in your domain name, he will be redirected to your website.
To do that, you need to add or edit the “A” record to map the domain name to the IP address of your server.
Go to where your domain name is hosted, open its DNS settings or the advanced settings or whatever your domain name registrar names it.
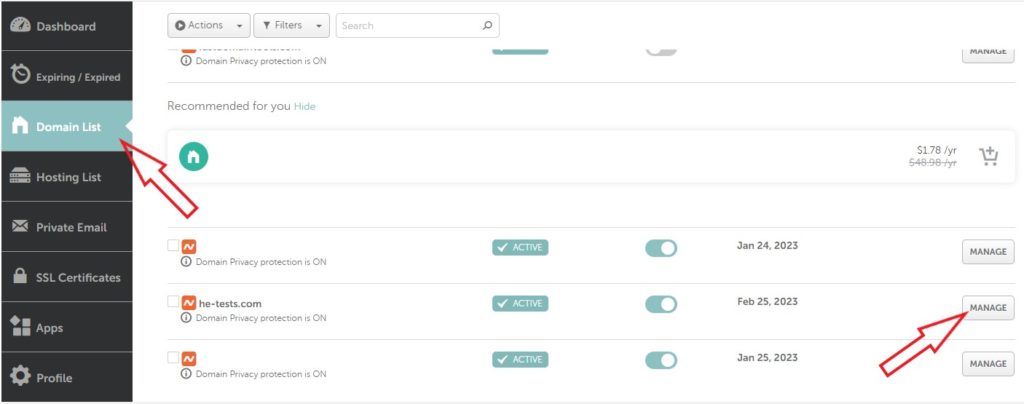
Click add a record, and select the A record.
- In the Host field, add the “@” sign. This represents the origin domain.
- Copy the IP address of your server and paste it into the value field.

If there’s a record that already exists, edit its value. Cause you can’t add more than one record. Save the changes and you are done.
Step 5: Install Let’s Encrypt Free SSL Certificate
Your website by now should run perfectly, but it’s not secured by an SSL yet.
Before we go on with the SSL Certificate installation, verify that the DNS of your domain has finished propagation, and the domain name is visible throughout the internet.
Another way to check is by typing in the domain name in your browser. If it takes you to your website, then it’s propagated successfully. If not, wait for a couple of minutes.
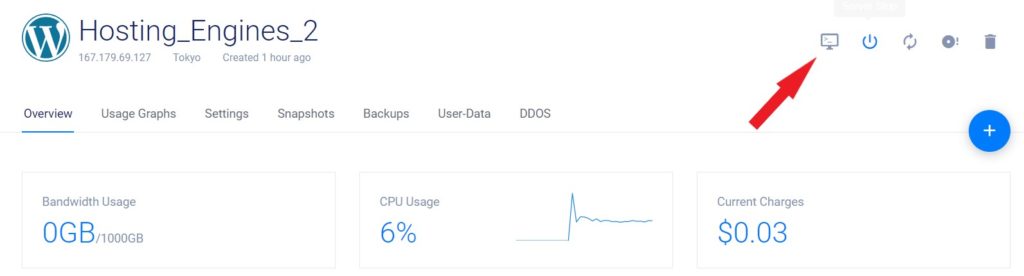
To install the Let’s Encrypt free SSL certificate, open your server overview and click on the View Console icon to access the server. Or use a third-party SSH terminal like Putty.
Use the root login from the Server Information screen. the username and password.
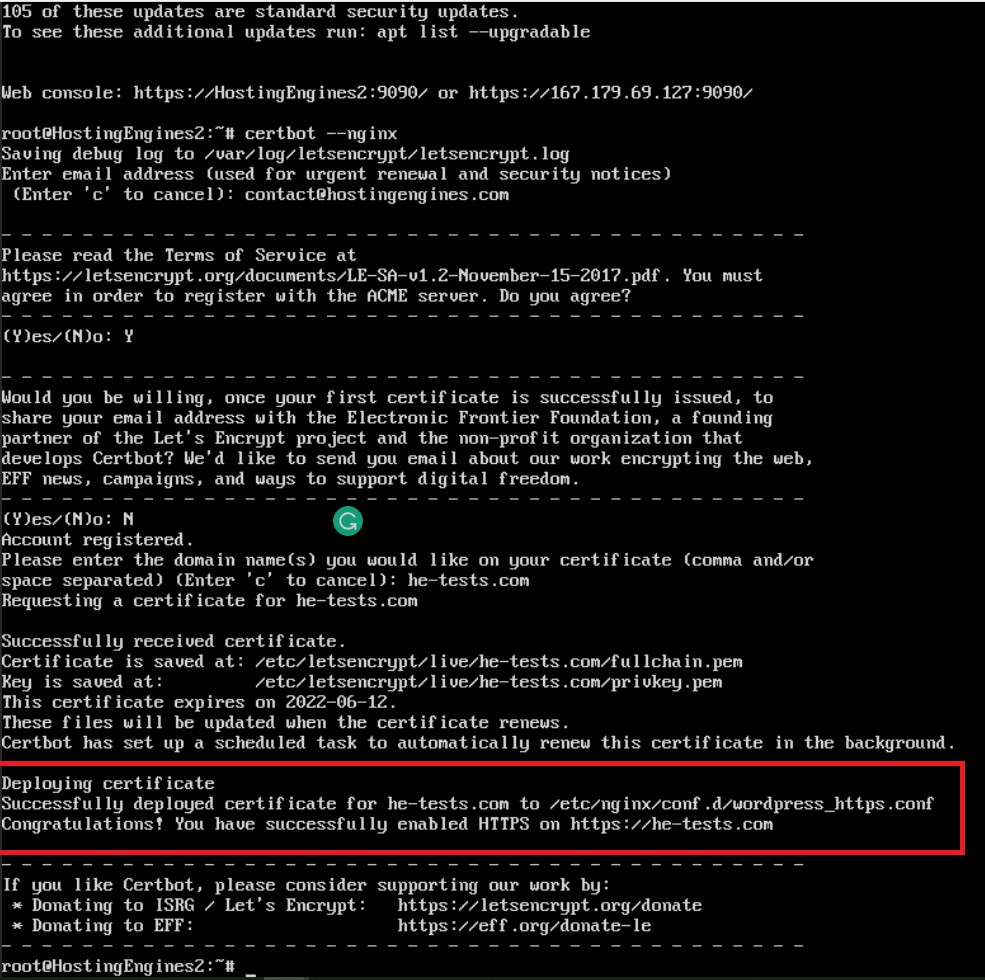
After you log in to your server root, copy this line below and paste it into the SSH terminal, and hit enter.
sudo certbot --nginxNext, the SSH terminal will ask for your email address to notify you when the SSL certificate expires. Enter it and press Enter.
Next, agree to the terms of service, type in “Y” for yes, and press enter.
The following step asks if you are willing to share your email address, enter “Y” for yes and “N” for no, and then press enter.
At last, type your domain name and hit enter. you should see a message that tells you that an SSL certificate has been successfully deployed.
By now you should have a WordPress website installed on Vultr Cloud Compute and it’s secured with an SSL certificate.
Read how to migrate your WordPress site to Vultr.
Final Words
Vultr is one of the best cloud hosting services on the entire internet. It offers reliable hosting products with high performance at a low price.
Installing WordPress on a Vultr server has become an easy task to do. In fact, Vultr made it very simple even for beginners.
Following these steps will lead you to create your own WordPress website on Vultr without any developer help.
Read also:
Start a WordPress Blog
Install WordPress On DigitalOcean
Install WordPress on Linode
Create and Install a WordPress Website On Cloudways
Create a WordPress Website on DreamHost
How to Host and Install PHP Script on Vultr