Do you want to install WordPress on the DigitalOcean droplet to get tremendous performance at a low cost? Well, It’s not hard -as it sounds- to do so.
By the end of this tutorial, you will be able to create a WordPress website on DigitalOcean cloud VPS, configure the server, and more. But first, what is DigitalOcean?
About DigitalOcean
DigitalOcean is a cloud web hosting company that provides many cloud computing services. It’s a well-known company that provides fast and reliable web hosting solutions.
Now DigitalOcean has 13 data centers available in 185 countries around the world and has incredible 99.99% uptime and it has one of the fastest cloud servers in the world.
Since DigitalOcean has 13 data centers around the globe, you shouldn’t worry about your website’s performance and reliability. As all cloud providers do, they store a copy of your website on each server, so if a server fails, another server will do the job.
Cloud computing is the delivery of computing services over the internet. Including servers, storage, databases, networking, and so on.
With that being said, let’s jump right into the first step of how to install WordPress on DigitalOcean.
Step 1: Get Your Domain Name Ready
It is well known that you must obtain a domain name to get your website published on the internet. DigitalOcean doesn’t provide this service to register a domain name, but you can register it elsewhere.
If you already have a domain name you can skip this step and go to the next one.
If you don’t have a domain or you want to register a new one, register a new one in any web domain registered such as NameCheap, One of the best domain name registrars.
Use the NameCheap coupon code (NEWCOM598) to get a discount for new users.

Step 2: Sign Up For DigitalOcean
To sign up for DigitalOcean go to digitalocean.com and then click on sign up. You can sign up with your Google account, GitHub, or by email. Use our link to get a $200 free credit for 60 days, instead of $100.

Choose how you want to sign up for DigitalOcean, then verify your account.
Once you do that, you will be redirected to a page where you should select your payment method. Card or Paypal. Select your desired payment method and then enter your payment information.
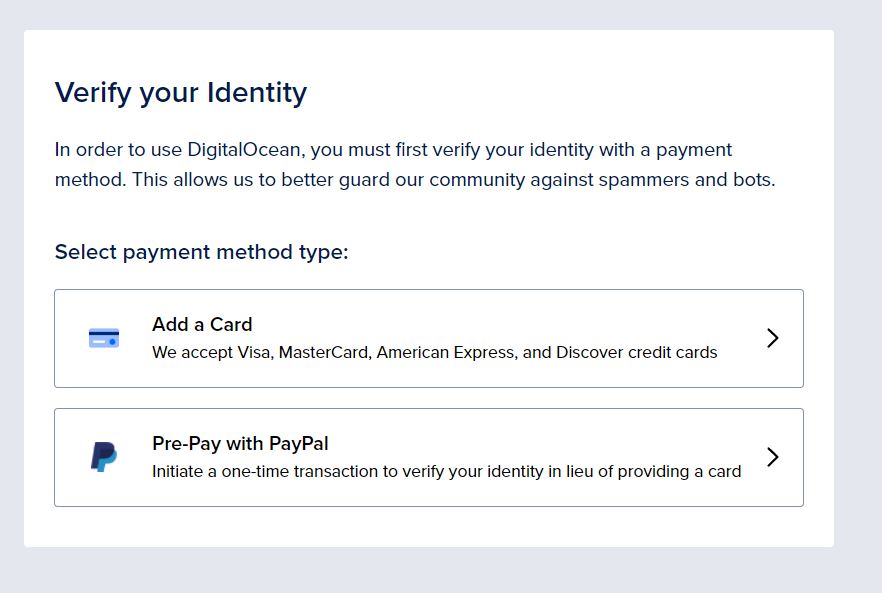
DigitalOcean requests payment information to ensure that the user is able to make future payments. Because they don’t charge you upfront.
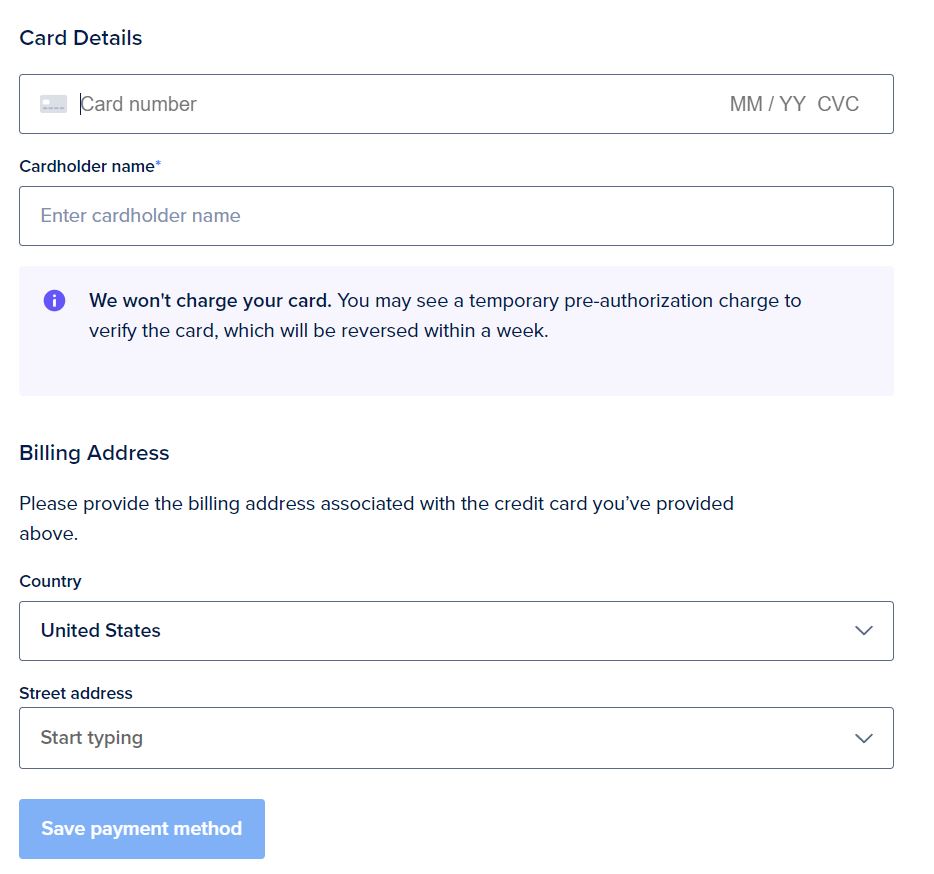
When you choose the card payment you need to fill in your card information and your billing address. After that, confirm your card ownership.
When you choose the PayPal payment, you will be redirected to your PayPal account to confirm the payment.
Either way by Card or Paypal payment method, $5 at least will be deducted from your account to ensure your payment validity.

The money withdrawn from you will be deposited into your DigitalOcean account for later use. Once you do all that, you can log in to your DigitalOcean account.

Finished signing up? now it’s time to install WordPress on DigitalOcean
Step 3: Deploy a Droplet and Install WordPress
DigitalOcean Droplets are Linux-based virtual machines (VMs) that run on top of virtualized hardware. Each Droplet you create is a new server you can use, either standalone or as part of a larger one.
In other words, a droplet is a server that has its own resources like RAM, Bandwidth, CPUs, etc.
DigitalOcean offers two types of servers. Regular servers, and premium server that uses the newest Intel and AMD CPUs and NVMe SSD storage disks.
To create a WordPress website on DigitalOcean, you first need to create a droplet or server and then install WordPress on it.
Create a droplet:
To create a droplet go to the main panel on the left side of the control panel on the DigitalOcean dashboard.
Click on the Manage rollout tab to see all DigitalOcean options and from there, select Droplets.
If you already have droplets on your account, you’ll see all of them here, and if you don’t, you’ll see a big Create Droplet button in the middle.
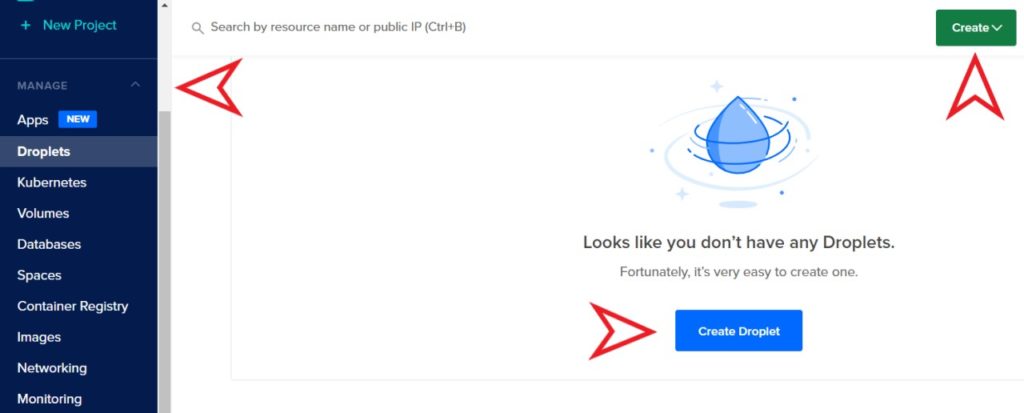
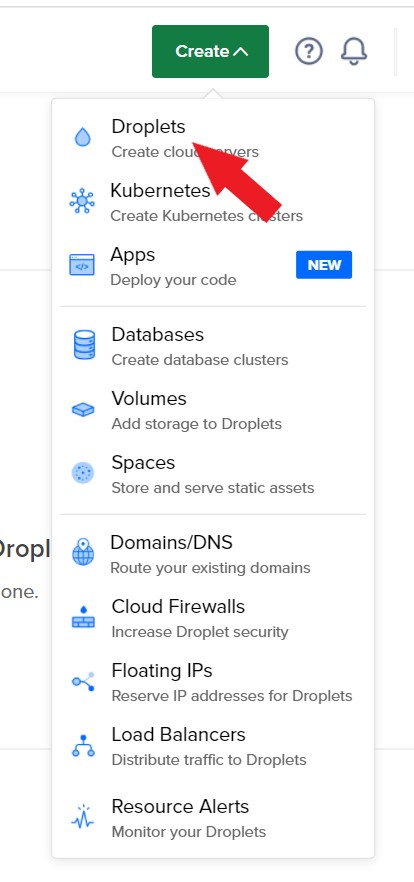
Click on it or on the “Create” button in the upper left corner of the dashboard. Once you click on it, It’ll show you all the options you can create with DigitalOcean. From there select Droplets
When you choose to create the droplet, all the options and settings of the droplet that you want to create will be there.
At first glance, it may seem overwhelming. So, let’s break down the steps of creating it one by one to make it easy for you.
Choose a data center region:
DigitalOcean has 13 data centers in seven different countries. The closer the data center is to your clients, the better your website will perform. Choose the closest data center to the potential customers you want to target.

If the region has more than one data center, you can select the one you want from the drop-down Datacenters.
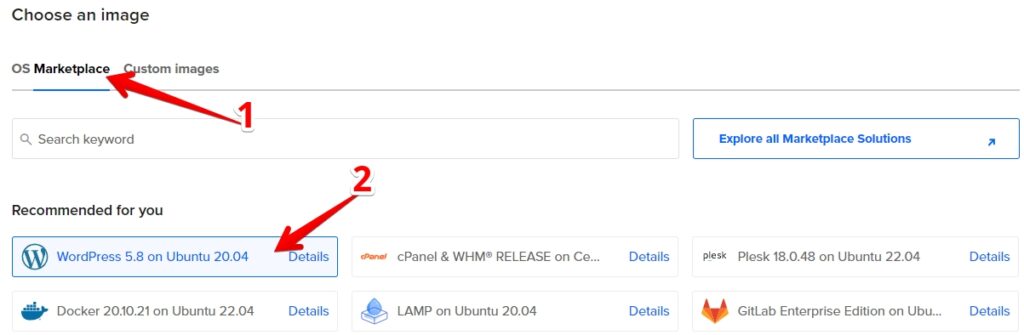
Choose an image and choose a WordPress application:
Go to the “Marketplace” tab and choose WordPress. It should be in the recommended first results. If it’s not, search for it from the search box.
3. Choose server size:
In this section, you need to choose the size of the server you want to create. The pricing and the amount of resources.
- The first option is to choose the web hosting type, shared or dedicated CPU server. In our case, we want to create a droplet, so, we will select the Shared CPU.
- The second option is to choose the type of your droplet, Regular CPU, Premium Intel, or Premium AMD. There are no major differences between them for small websites, but still, the premium is better than the regular.
- The third option is to choose the server size. the pricing and resources you need for your website. For small and new websites, the $6/month is quite enough.
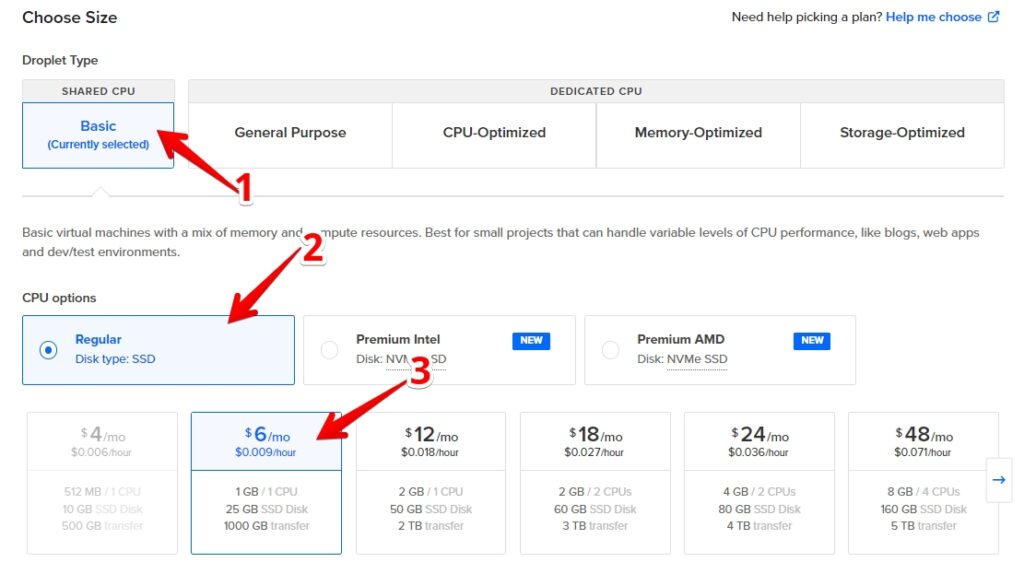
The first cheapest $6 per month is ideal for smaller sites. If your website gains more traffic in the future, you can easily scale up your plan.
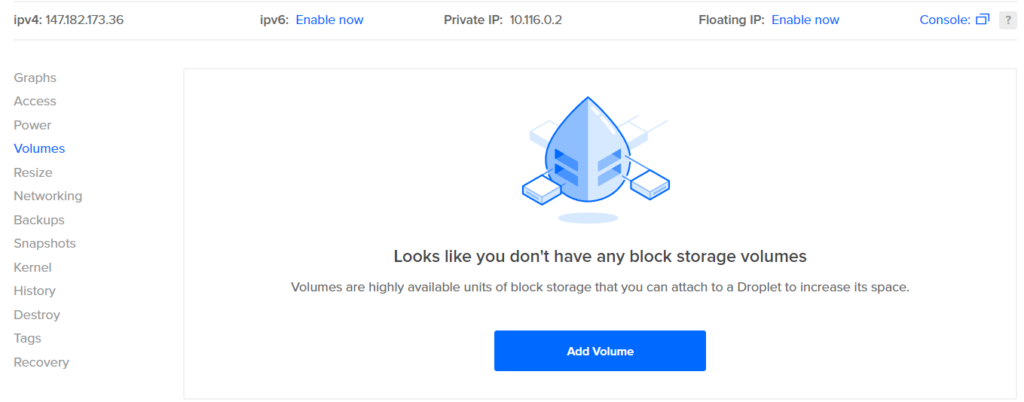
Add volume (block storage), if you need to:
Volumes are network-based block devices that provide additional storage space for Droplets.
You can use volumes when you need more disk storage but don’t want extra CPU or data transfer and RAM Like when you plan to host large files on your websites like videos and podcasts.

To add a volume click on Add Volume, to open the additional storage choices. Select the volume capacity you want and go to the next step.

In DigitalOcean, a 10 GB block storage costs $1 per month. a 100 GB volume costs $10 per month.
Once you select one of the volume options, it will be created along with your server. If you don’t want volumes, click on Remove Volume.
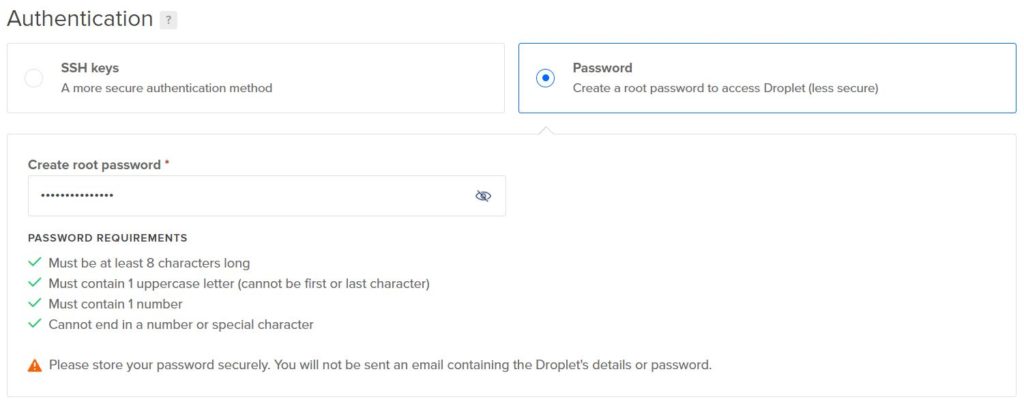
Authentication method (Access Credentials):
DigitalOcean gives you two options to access your server root, either with an SSH key or a Password. If you are familiar with the SSH key, it is a better option. Otherwise, use the password option.
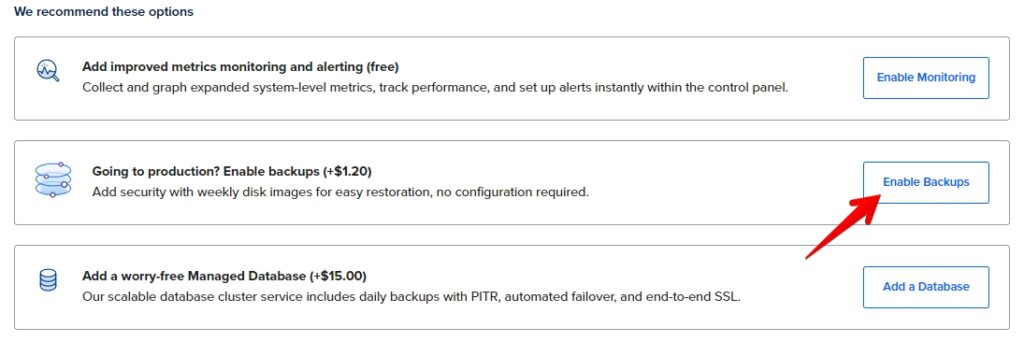
Additional options:
When you scroll down, just under Authentication you will see these additional options DigitalOcean recommends.
Monitoring is a cool feature, But we urge you to enable the Backups, as they are the best thing that guarantees your application restoration after a website crash or malware attack.
Backups on DigitalOcean cost 20% of the droplet price. Therefore, if your droplet costs $6/mo, you will be charged $1.2/mo for backups.
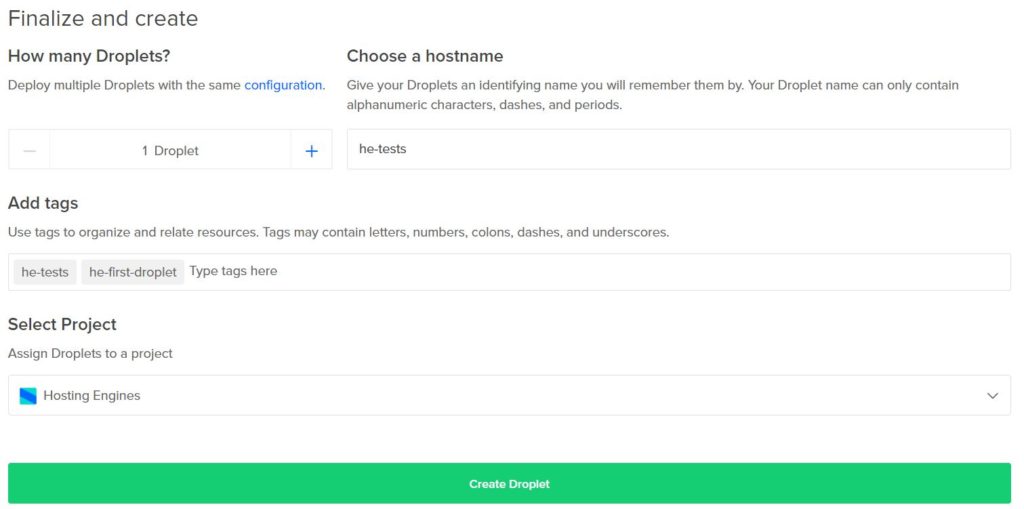
Finalize and launch the droplet:
This is the last step of creating your droplet.
In the first option, you determine how many droplets you want with the same configuration and capacity.
Next, choose a unique name for your droplet. This name identifies your droplet. Your Droplet name can only contain alphanumeric characters, dashes, and periods.
You can use tags as well to organize and relate resources. You can use this option if you plan to host lots of droplets in your account.
Finally, click Create Droplet.
Wait for a few seconds, and then you will see that your server has been created. And WordPress has been installed along with the server creation.
Step 4: Configure the Droplet Interface
There are several options and settings in every droplet that you should know about. The Projects on DigitalOcean can contain multiple droplets. And you can make multiple projects on one DigitalOcean account.
When you click on any project, all the apps in that project will show up. The image below shows what the droplet looks like after installing it.

When you hover over the droplet name, you will see the droplet server location, RAMs, and disk storage. And the set of numbers beside the droplet name is the IP address of the server.
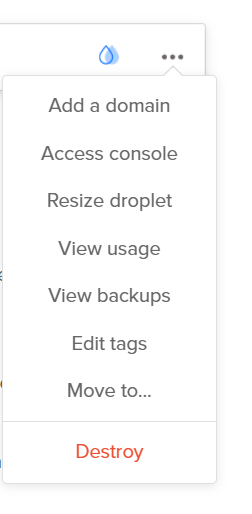
The three dots on the right of the droplet panel are the settings of the droplet. From there you can access the server via SSH terminal, resize droplets, view backups, delete the droplet, and more.
More settings will be seen when you click on the droplet name such as monitoring, access details, Resizing, and more.
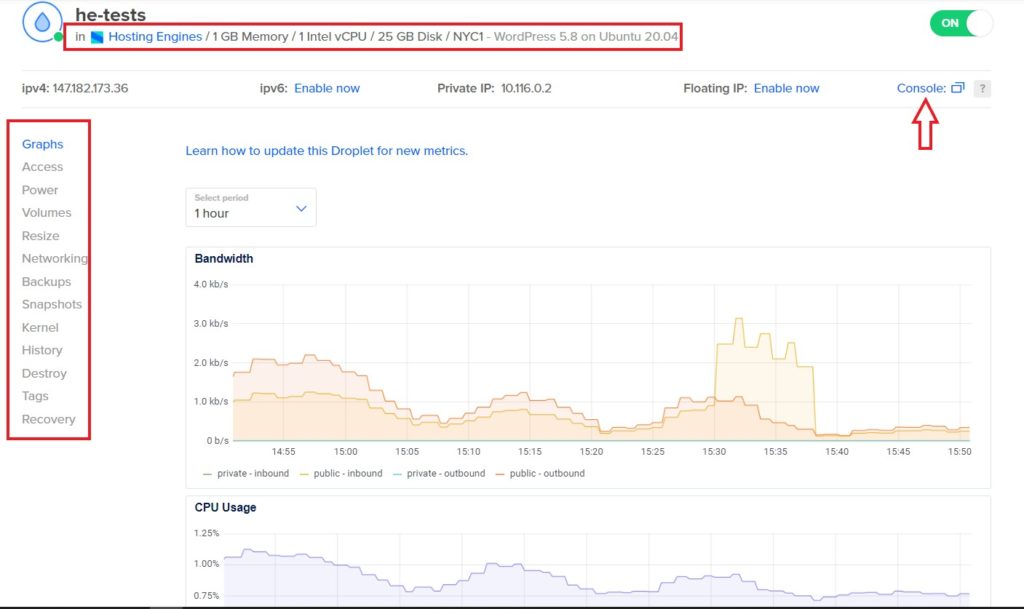
- Under the droplet name, you’ll find the droplet details like the droplet resources and the droplet applications.
- The left panel shows different options for the single droplet. The Graphs is simply monitoring the server.
- The Graphs show how much your application is consuming the server in terms of CPU usage, memory, disk space, bandwidth, etc. So you know exactly how your server is performing.
- You can turn the droplet power off, resize the server, add volume, see backups, and many more features from there.
- The console to the right of the dashboard is a terminal that allows you to access the server via SSH root, and that’s what we are going to do next.
Step 5: Point the Domain to The Droplet
To point the domain name to the droplet, copy the IP address of the droplet then go to where your domain name was registered.
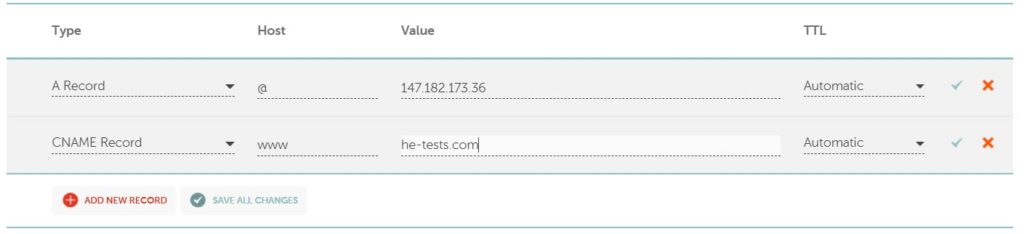
Go to the DNS settings of the domain and add an “A” record and a “CNAME” record.
The “A” record maps a domain name to the IP address. So whenever someone clicks on your domain name, he will be directed to your website.
To add an “A” record, click add new records, in Host insert the “@” sign, and in Value paste the IP address of your server( droplet).
The “CNMAE” record redirects the “www” version of your website to the “non-www” version.
To add the “CNAME” record, in Host type “www”, and in Value type in your domain name as you see in the image below.
Step 6: Complete The Server Setup
After you installed WordPress one click on the droplet, you need to access the droplet server as root via SSH terminal to finish the droplet setup.
Log in to the server via SSH terminal:
You can log in to your server root via the droplet console that DigitalOcean provides, or via a third-party terminal such as Putty.
To access the server using Putty you need to enter the IP address and the password that you created during the droplet installation.
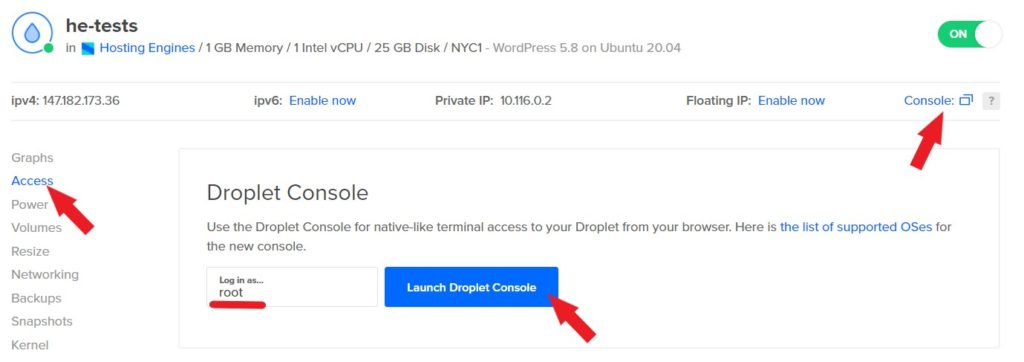
In this example, we will use the DigitalOcean console. Since we already logged in, we don’t need to enter either the IP address or the droplet Password.
To log in to the server root via DigitalOcean console, click Console, or go to Access, log in as root, then click Launch Droplet Console. Once you do that, the droplet console will automatically access your server root.
Complete WordPress installation:
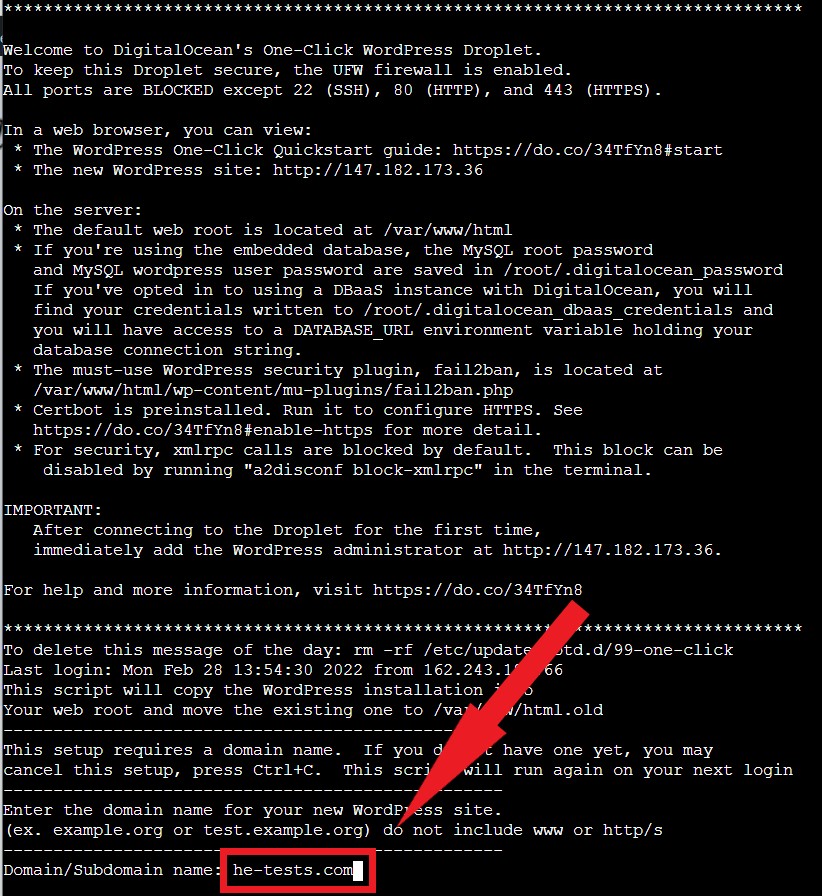
In the terminal window, you will see a bunch of lines. Ignore them and go to the bottom of the lines.
It’ll ask you to enter your domain name, and type in your domain name with “HTTP” like (he-tests.com) as you see in the image below. Once you type in your domain name and hit enter to go to the next step.
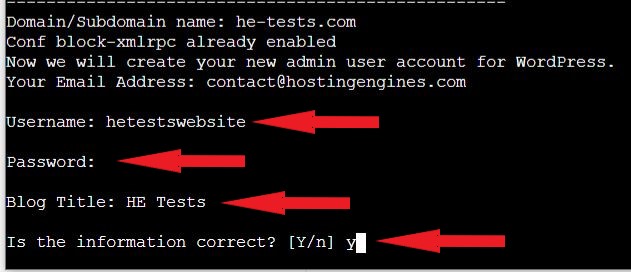
Next, you will create the admin user credentials of WordPress. The username and password of your WordPress website. Starting with entering your email address. type in your email address and press enter.

Next up, enter the username and press enter, then enter the password and again press enter as shown below. These will be the WordPress admin credentials.
When you type your password, it will not be visible on the screen for security purposes. So write it carefully. After that type in the title of your website and press enter.
To confirm that the information you entered is correct, type “Y” and press enter again.
Install Let’s Encrypt SSL certificate:
The next line will ask you if you want to install the Let’s Encrypt SSL certificate. Type “Y” to confirm and hit enter on the keyboard.
Then you will be asked for an email address to get notified with it when the SSL certificate expired. Enter the domain name and then click enter.

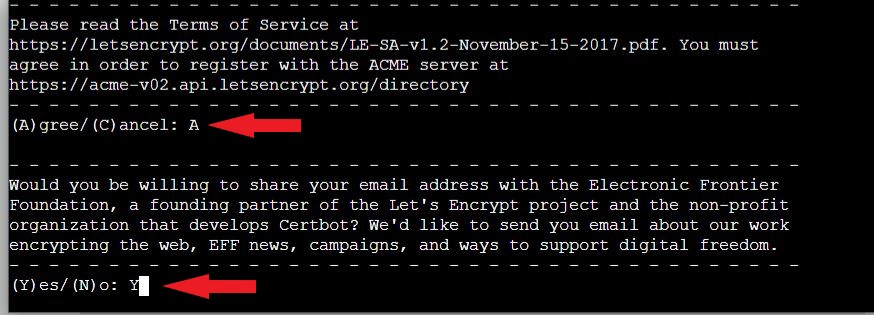
The next line asks for your agreement to DigitalOcean’s terms of service. Type “A” to agree and press enter.
Next, you will be asked if you want to share your email address with the Lets Encrypt foundation. Enter “Y” if you want or “N” if you don’t want and hit enter for the last time.
Once you go through all that, you should receive a confirmation message that tells you that WordPress has been installed successfully. Wait for a few minutes for your SSL certificate to propagate.
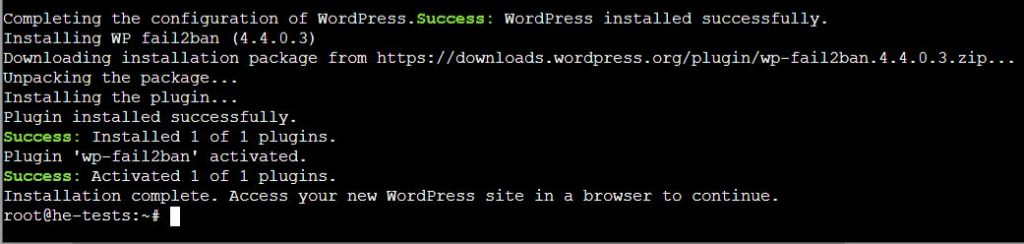
Now you can use your domain name to see your WordPress website. And you can go to “https://yourdomain.com/wp-admin” to access your WordPress admin area with the username and password you created earlier.
WordPress on DigitalOcean: The Conclusion
DigitalOcean is one of the best cloud hosting providers out there with a reputation that precedes it.
Yes, it may take some time for new users to install and configure WordPress on DigitalOcean, but it’s totally worth it.
I recommend you go with DigitalOcean right away, it’s a cheap, fast, and reliable cloud computing service.
Read also: DigtialOcean vs Vultr vs Linode comparison.