Vultr is one of the best cloud hosting services on the internet, it offers hosting solutions that have high performance and reliability.
Migrating your WordPress website from your old/shared hosting to Vultr servers can be a great Idea. Here are some reasons:
- Vultr is a cloud hosting. that means more performance, speed, security, and low cost.
- Cheap compared to what it offers. a cloud VPS server on a shared CPU, but dedicated resources as low as $5/month.
- Pay-as-you-go. You won’t be charged for a whole year or two, or even a month. Instead, you will only pay for the resources you consume.
- Scalable. If your website grows, you can upgrade your server for more resources with a click of a button.
Read Vultr review.
Here is a summary of what you will go through to achieve a WordPress migration, and transfer your website without downtime:
- Back up your existing website’s files.
- Export your WP site content.
- deploy a Vultr server with WordPress.
- Update your domain DNS records.
- Import your old website’s content to the new one.
- Install a free SSL certificate.
- Check everything is set up and running smoothly.
Step 1: Backup Your Existing Site
Before you start migrating your site, make sure you have backed up your website source files either from the hosting provider or manually.
This step is important, as it ensures your website file’s safety. If anything goes wrong, you can revert to this backup.
Step 2: Export Your WordPress Site Files
In this step, you will need to export your website’s files somewhere to prepare these files for migration to the Vultr server.
You can use a WordPress plugin such as All-in-One WP Migration, Duplicator, or Jetpack to get this step done.
Go to your website admin panel, then navigate to Plugins > Add New.
In the search bar type in the WP plugin name. In our case, it’s All-in-One WP Migration.
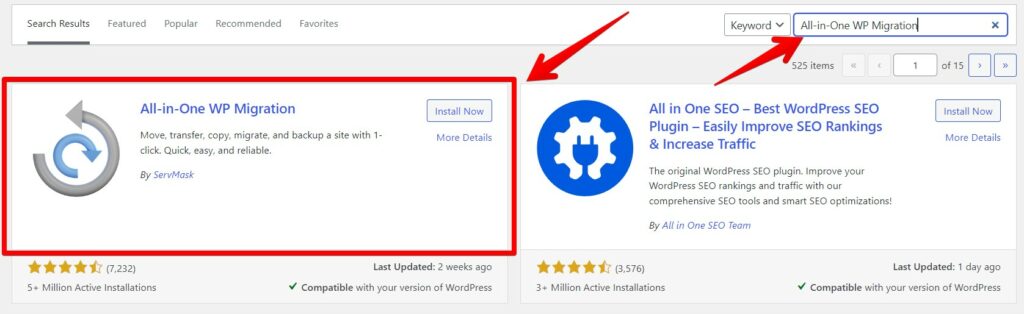
Once you find it, click on Install Now, then click on Activate.
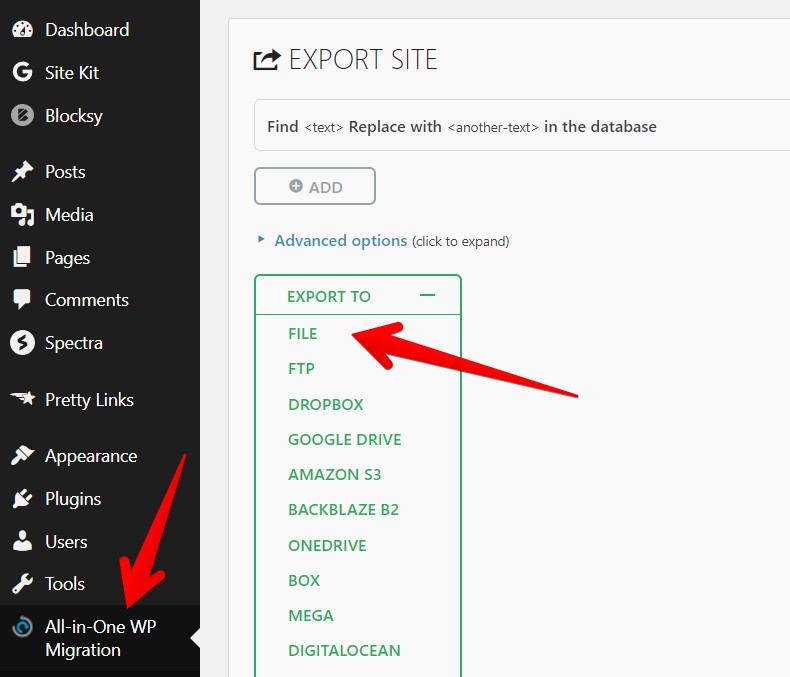
Once you do that, you will notice that a new menu (All-in-One WP Migration) appeared in the admin panel.
Hover over it and click on Export.
Next, click on EXPORT TO and then choose File to export it to your local PC.
Wait for a while until the plugin prepares the files and then click on the Download button in the poped up window.

Once you do that, your WP site files will be downloaded to your computer and ready for migration. Close the window and you are done.
Step 3: Create a Server and Install WordPress on Vultr
In this step, you will choose a VPS plan, configure it, choose WordPress from the marketplace, and then deploy the server.
1. Sign up for Vultr:
If you have not registered yet, go to Vultr.com and click on Sign up to create an account.
Next, verify your account and add a payment method. Vultr offers many payment methods, choose the one you want.
You can use our link to get $100 Free Credit for new users. The credit will be displayed on your billing page after you add a payment method.
2. Deploy a VPS server and install WordPress:
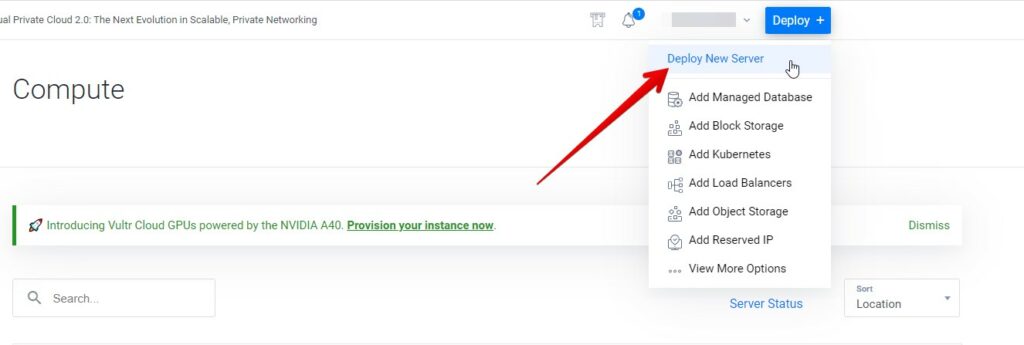
On the Vutlr dashboard, navigate to Products > Compute and click on Deploy Server.
Next, select the Cloud Compute option and then select any of the 4 CPU plans.

After testing all four plans, the High-Frequency option tends to perform slightly better than the other, and the High-Frequency AMD comes second.
But all server plans can get the job done perfectly. Read Vultr High-Performance Vs. High-Frequency comparison.
Next, select the Server Location. The closer the data center is to your targeted audience the better.
In the Server Image, click on the Marketplace Apps tab and search for WordPress. Select it and go down to the next step.
Next, choose the Server Size. The $6/month plan is enough for small sites. Also, you can scale up your server later.
Enable the Auto Backup to insure your website safety. This will add a 20% extra charge, but it’s crucial.
Next, enter your email and the WordPress website name.
After that, scroll down to Server Hostname & Label and add any name for your server. These will appear on the Vultr dashboard.
Lastly, click Deploy Now.
Wait for a while until the server is fully installed and configured by Vutlr’s side and your WP site will be created.
Read in detail how to install WordPress on Vultr.
Step 4: Update Domain DNS Records
At this stage, you need to update your domain name DNS records.
Any record that points to your old website IP address will be edited to point to your Vultr server.
Copy the IP address of your server and go to where you manage your domain.
Navigate to your domain DNS records and change the old IP address with the one you copied.
Do this to all records that hold your old site IP address.

Step 6: Import Your Website Files
Now it’s time to move the exported files to your new WP site. Follow the simple steps below:
1. Access your new WP admin dashboard:
Go to (https://yourDomain.com/wp-admin/). This will open a page where you should enter your WordPress website credentials.
Scroll down in the WordPress Details section until you find the WordPress Administration Panel.
Go back to the WordPress Details section in the Vultr server dashboard and scroll down until you find the WordPress Administration Panel.
copy the Username and Password, paste them into the required fields, and click on login to access your admin dashboard.
2. Import your old website content:
Once you are in the admin dashboard of your site, go to Plugins > Add New to install the All In One WP Migration plugin.
Hover over the new menu and this time click on Import.
Next, click on Import From and choose File.

This should open your PC browser. Select the file that you exported earlier.
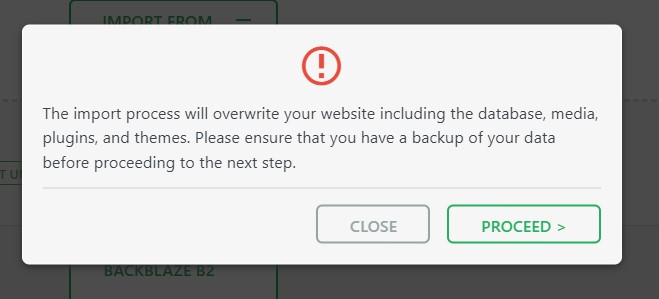
Wait for a while until the plugin finishes importing the files and sees a pop-up window. Click on PROCEED.
Once the importing is done, you will see the message (Your site has been imported successfully!). Click FINISH and you are done.

After migration, the credential “username and password” of your new WP site will be the credentials of the old site as they will be migrated as well.
Step 6: Install SSL Certificate
The free Let’s Encrypt SSL certificate should be installed with the Vultr server when installing WordPress.
If this is not the case, use the instructions below to install the SSL certificate.
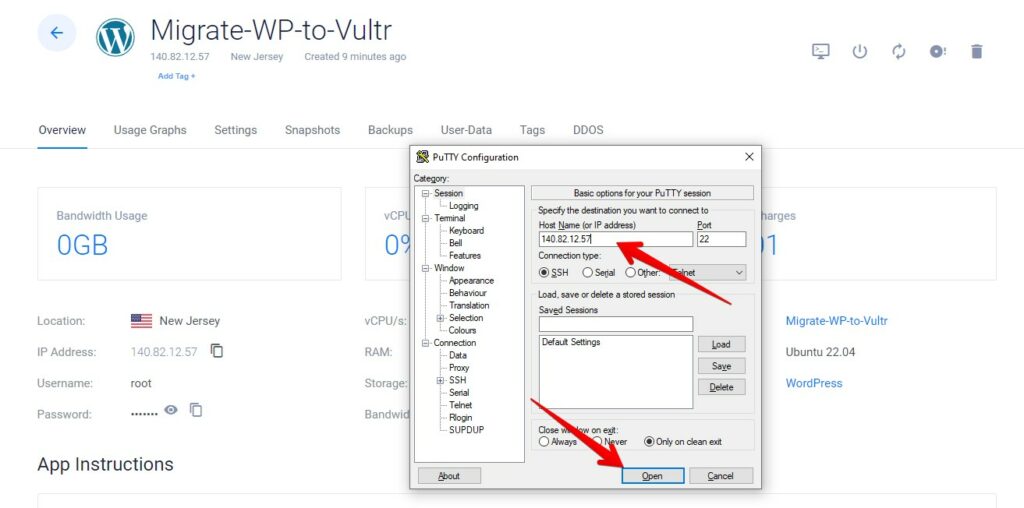
This requires accessing the server through an SSH terminal. You can use a tool like PuTTY.
Install the terminal, launch it, enter your server IP address, and click Open.
Login as root and click Enter
Next, copy the server password from the server dashboard on Vultr. Right-click on the SSH terminal and click Enter
This should give you access to the server.
To install the certificate using certbot copy the line code below.
Change example.com with your domain name and the email with your email.
certbot --nginx --redirect -d www.example.com -m [email protected] --agree-tos --no-eff-email
Step 7: Test Your New Website
Check if everything is good. Test your website performance, accessibility, and navigation.
Check if the style and the JS are/are not ruined by the migration an
Once you double checked everything is fine, you can remove your old site and cancel your old web hosting service from the hosting provider.