Your old shared hosting is probably not a great choice for your website as your visitors are increasing and you want to migrate your WordPress website to a cloud-managed web hosting such as Cloudways.
Well, the good news is that you can migrate your WordPress website to Cloudways with no downtime and in no time, and with the right steps, it can be a smooth and easy process.
This migration tutorial will work with every WordPress website as long as you have the access to the admin panel on your existing WordPress website.
By the end of this step-by-step guide, you will be able to migrate your WordPress website from your old hosting provider to a Cloudways server.
Step 1: Install WordPress on Cloudways
Since you want to migrate your WordPress website to Cloudways, I assume that you created a server on Cloudways. If you don’t, read how to create a server on Cloudways.
The first thing you need to do is to create an application on the server you created to transfer your website’s files to it.
When you create an application, Cloudways will create server files and a database for that application with all the necessary credentials. And that’s what you need for your new WordPress website.
When you create a server on Cloudways for the first time, You will be created an application along with it. It could be WordPress or any type of application.
However, you can use the WordPress you created along with the server creation, or install another WordPress application.
How to Install WordPress on Cloudways?
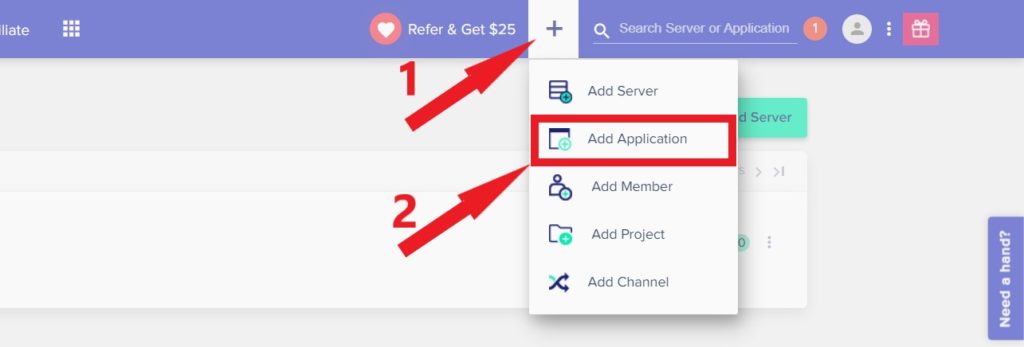
To create a new application on Cloudways go to Cloudways.com and login to your account. Next, click on the (+) sign in the top bar.
From there you can create a server, an application, a member, etc. From there select Add Application.
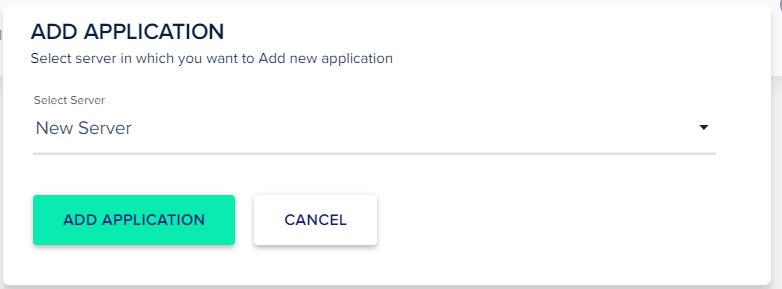
When you click on Add Application, a window will pop up telling you to choose the server on which you want to create the new application. Select the server and then click Add Application.
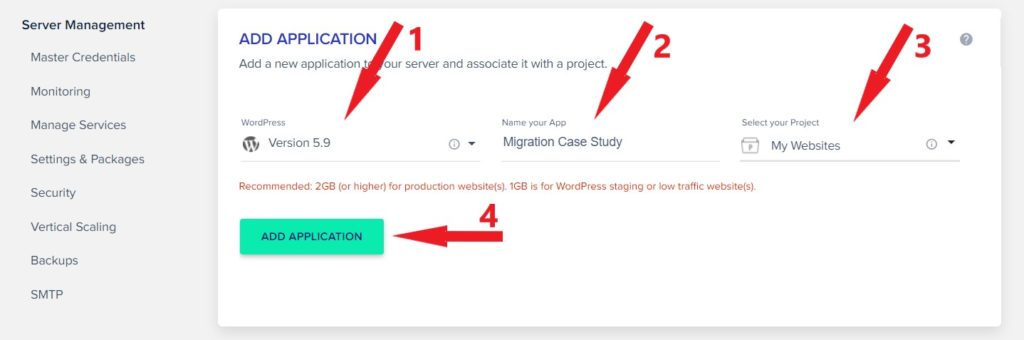
Next step, enter your application details. First choose what type of application you want to install, click Select Application to view the Applications that Cloudways provides. In our case, we want WordPress.
Next, name the application you want to create so that it’ll be easier for you to distinguish between your apps later when you have multiple websites.
The third option is to select a Project, the projects you created before, will appear in this option. Projects are just for organizing and categorizing applications.
After that, click Add Application. It’ll take less than 2 minutes to deploy the application.
Now that we have completely created a brand new WordPress website on Cloudways, Let’s move on to the next step of migrating our WordPress website to Cloudways.
Step 2: Install Cloudways WordPress Migrator Plugin
The next step is to install the Cloudways WordPress migration plugin on your old WordPress website. All you need for that is your WordPress username and Password.
How to install the Cloudways WordPress migrator plugin?
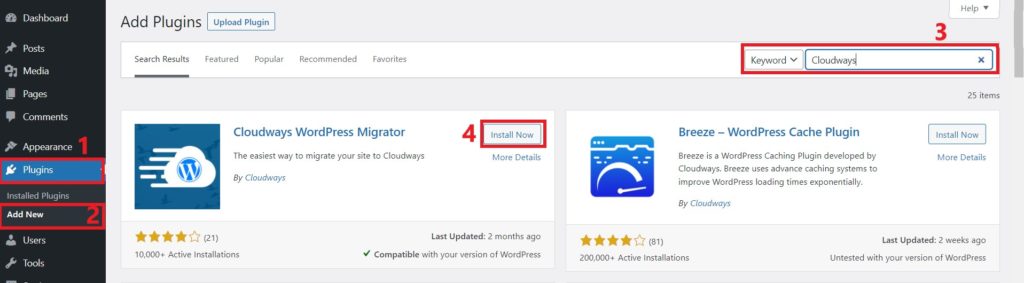
Login to your existing WordPress website, then go to Plugins > Add New.
Type Cloudways WordPress Migrator in plugins the search box to search for the plugin. Next, click Install Now, after that click Activate.
Step 3: Use Cloudways WordPress Migrator Plugin
Once you click activate, the plugin will automatically be opened. But if it didn’t you can find it in the WordPress main toolbar. Click on it to open it.
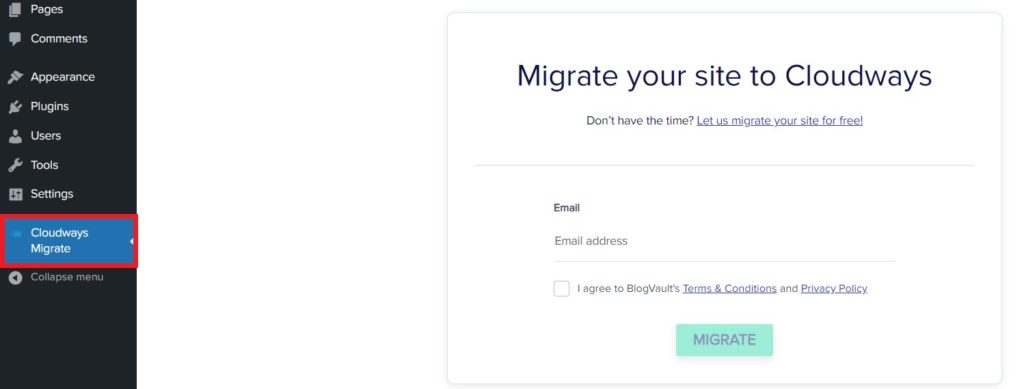
Next, enter your email address, click on the Terms and Privacy check box, then click MIGRATE.

Step 4: Enter the Migration Details
On the next page, you need to enter the details of the WordPress website you created on Cloudways so that the Migrator Plugin can target and identify your new WordPress website.
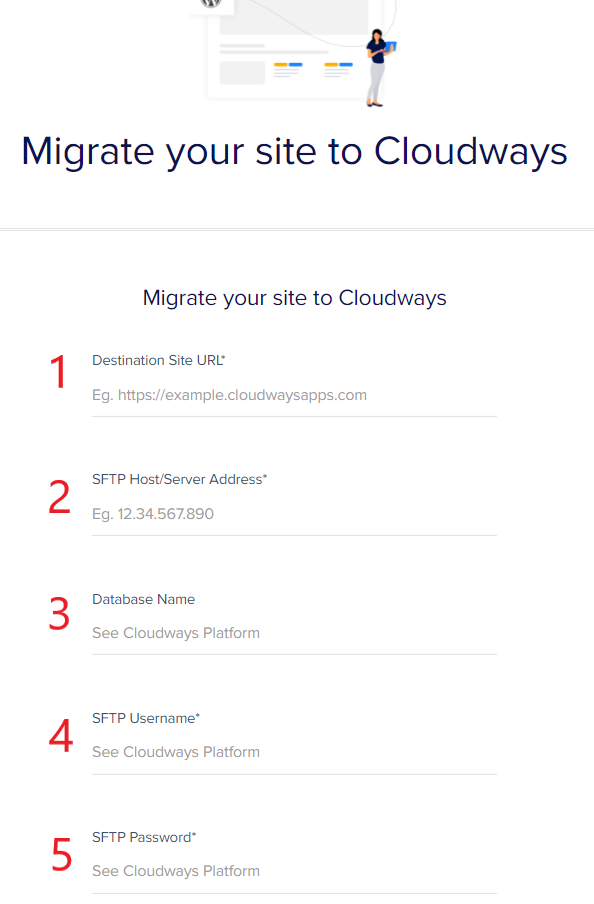
You can find all these credentials on your Application Management on Cloudways. Here’s how you can enter these details:
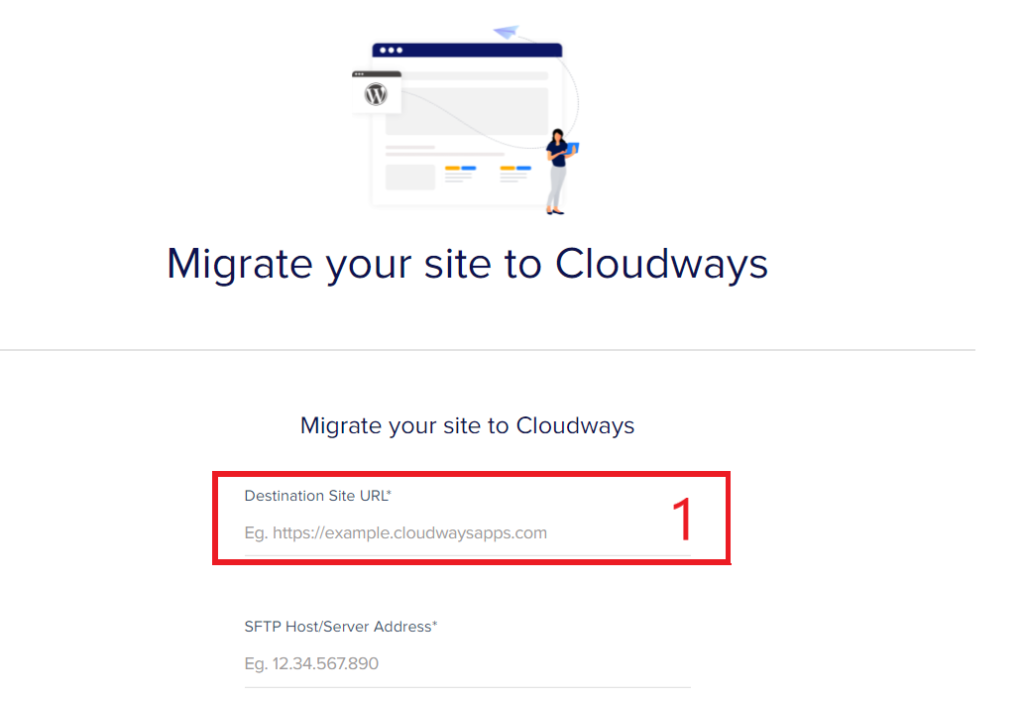
1. Destination Site URL:
The first option field is the Destination Site URL: the URL of the WordPress website you created on Cloudways.
Cloudways makes a “subdomain.cloudways.com” for every new website. To get the URL of the WordPress website, navigate to your new WordPress application.
Click on Applications in the top bar of the Cloudways platform, and from there you will see all websites that you have on all servers. Click on the application you created to open Application Management.

Another way you can use to open your Application Management is from the “www” sign on the left side of the server bar. The number beside the (www) sign determines how many websites or applications you have on that server.
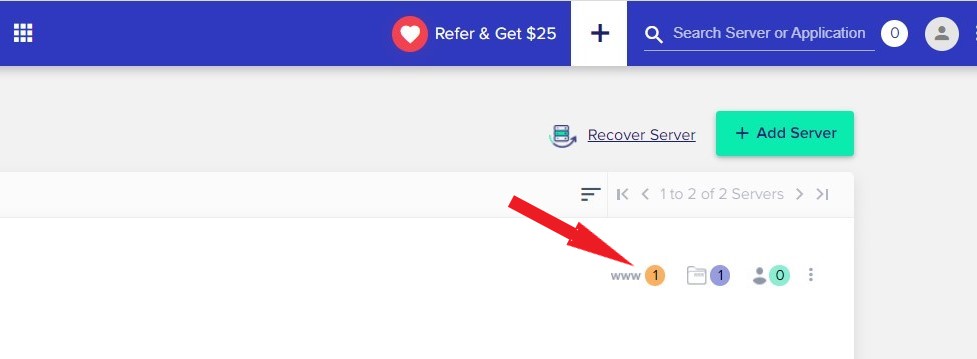
Click on it to see all the applications you have on that particular server and select the application to open its Application Management dashboard.
The image below shows the Application Management, by default you will be on the Access Details page the one that has all details you need. To get the website URL click on the icon beside your WordPress URL to take you to your WordPress website.
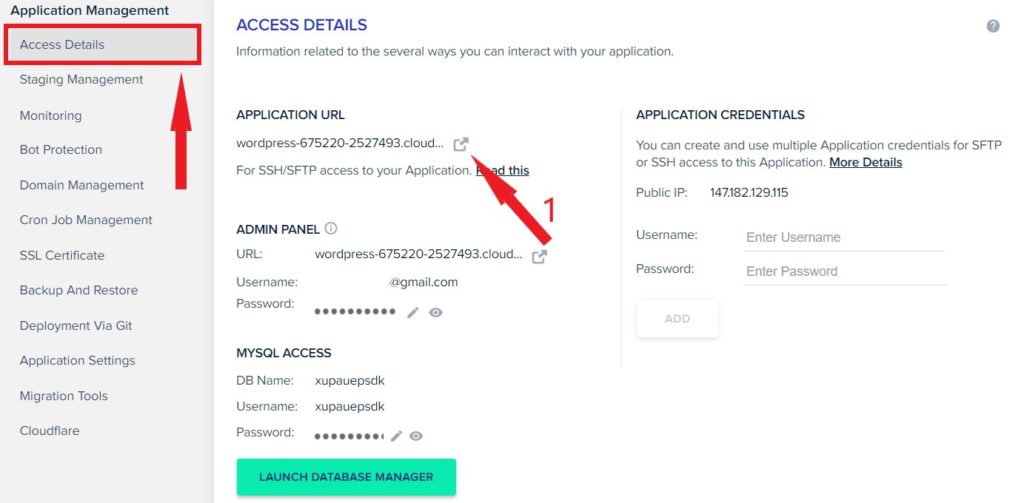
Copy this URL and paste it into the Destination Site URL field on the Cloudways WordPress Migrator Plugin.

2. SFTP Host/Server Address:
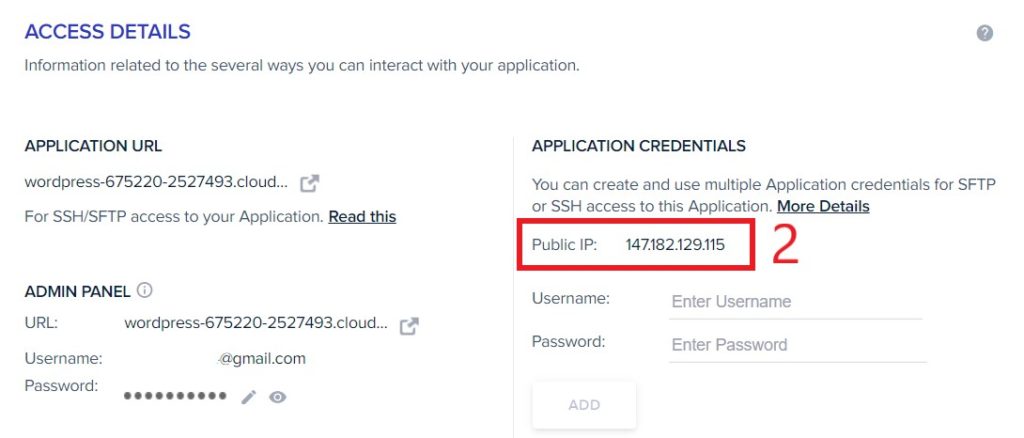
The next option is the SFTP Host/ Server Address, it’s the public IP address of the server that has your WordPress website.
Copy the IP address by clicking on it and paste it into the SFTP Host/Server Address field on the Cloudways WordPress Migrator Plugin.
3. Application Database Name:
Now you need to enter the Database name of the new WordPress and the Server Details details.
To get the Database MySQL name, go back again to Application Management. You will find the Database Name just under the MySQL Access section.
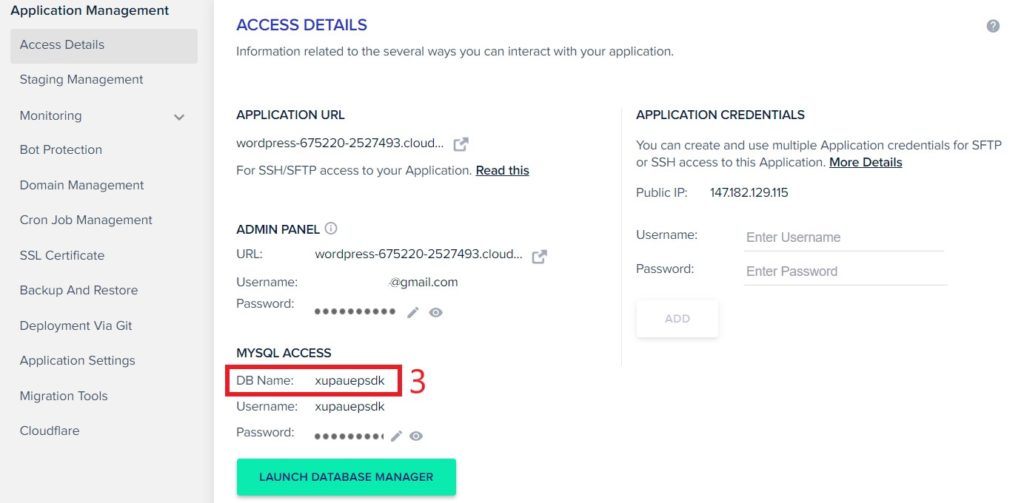
Click on the DB Name to copy and paste it into the Database Name field on the Cloudways WordPress Migrator Plugin.
4. SFTP Username and Password:
The next two fields are the SFTP Username and the Password. You can get them either from the Server Credentials or from the Application Management panel.
You will find these credentials just under the DB name. Copy and paste them into the SFTP Username and the SFTP Password fields on the Cloudways WordPress Migrator Plugin.
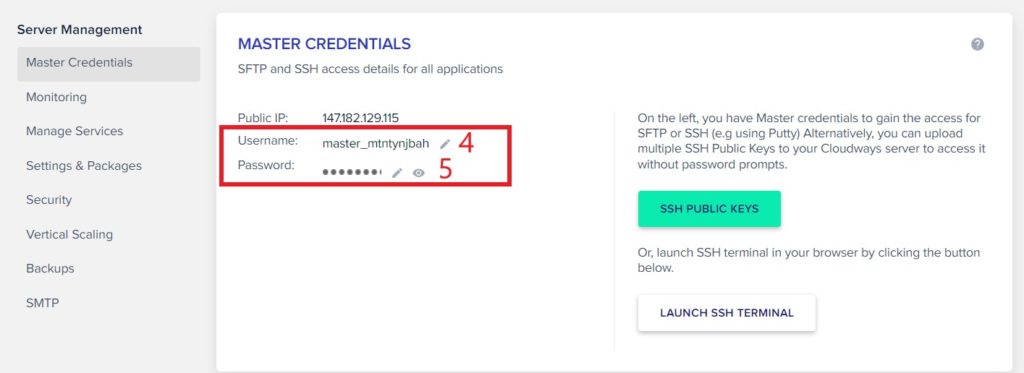
To use the Server Credentials instead of the Application Credentials Management, go to Servers on the top panel and click on the server that has the WordPress website.
Next, click on the Username to copy the Server Username and paste it into the SFTP Username field on the Cloudways WordPress Migrator Plugin. Do the same for the Server Password.
5. Additional Details:
For the following queries, you may not want to add them, leave them as they are, but never mind knowing what they do.
- Under HTTP Auth enabled? leave it as default “No” as you have not set up any password to visit the Cloudways-hosted application. If your Cloudways-hosted site is restricted and password-protected, select Yes and enter the username and password.
- Under Any root directories you want to migrate?, leave it as default “No” if you don’t wish to migrate your custom directories. But if you want to migrate your custom non-WordPress directories present in the public_html directory.
- Under Is this site protected?, leave it as default “No” if your current WordPress website on another host is not restricted and is not password-protected. If it is password-protected, then select Yes and enter the username and password.
Finally, click MIGRATE. Wait until the migration finishes and then move on to the next step
Step 5: Point your Domain to Cloudways
In order to let people access your migrated WordPress website using your domain name, you have to point your domain name to the Cloudways server that you hosted your WordPress application on.
But before you do that, make sure that the migrated WordPress website on Cloudways is running very well and that your content is not corrupted. Check the images, the links, and the design of the website. To access your new website you can use the subdomain Cloudways created.
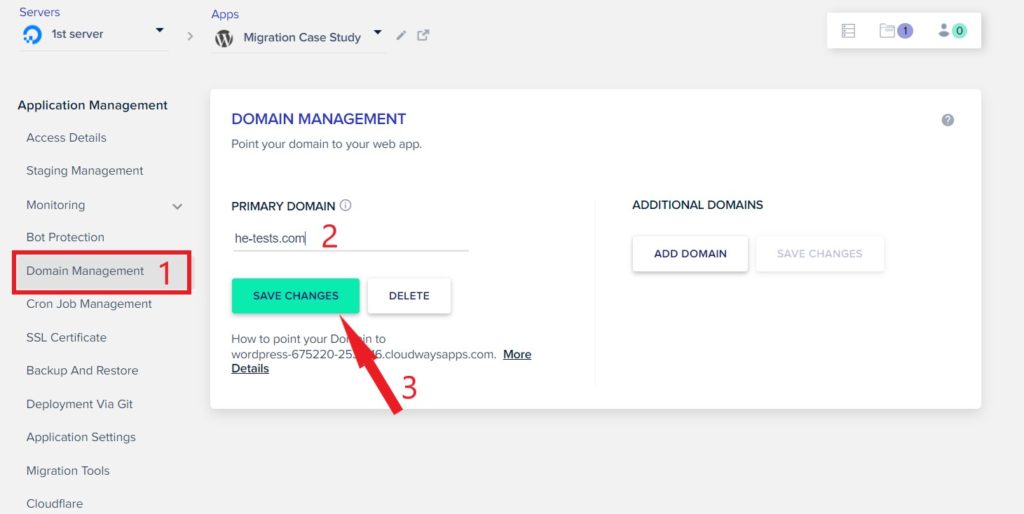
1. Add domain to your Cloudways application:
From the Application Management panel on the left side, click on Domain Management to go to your domain settings on your application. Next, under the Primary Domain, enter your domain name, and then click on Save Changes.
1. Point domain name to your IP address:
To point your domain name to your website IP address copy the IP address of the server that has the WordPress website.
Next, go to your domain name registrar and edit the “A” DNS records. Enter the new IP address instead of the old one and save the settings.

Now your domain name is totally pointing to your new WordPress website. See how to point your domain name on NameCheap, GoDaddy, and Cloudflare.
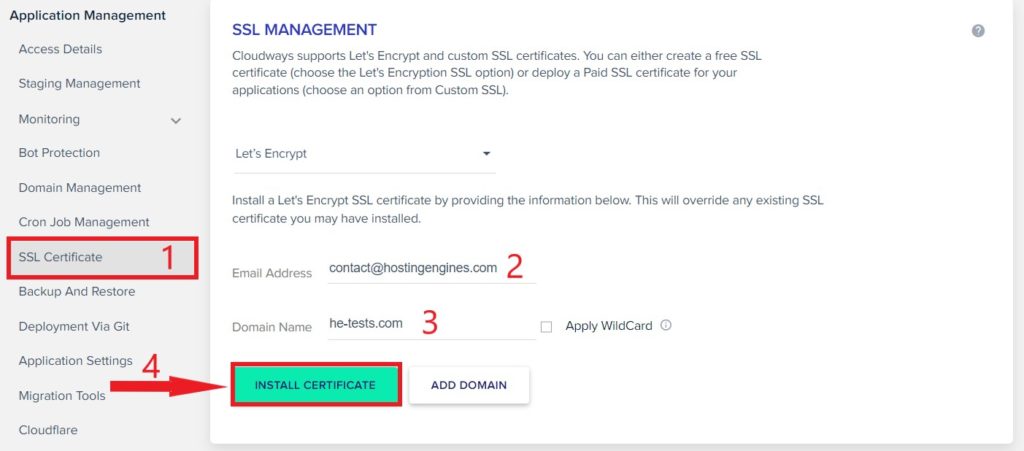
Step 6: Install a Free SSL Certificate
To install the free SSL certificate on Cloudways go to the Application Management panel of your website and select the SSL Certificate tab.
The “Let’s Encrypt” free SSL certificate is the default choice, so all you have to do is to enter an email address and your domain name in the empty fields and click Install Certificate.
You can install your own SSL certificate or the free SSL certificate. Eventually, your website is now secure.
In the end, you did migrate your WordPress website to Cloudways, pointed your domain name to your website, and installed an SSL certificate to give your website the lock icon.
The Conclusion
Migrating a WordPress website to a Cloudways server can seem intimidating at first, but by following the steps outlined in this guide, it can be done smoothly and efficiently.
With the help of Cloudways server, you can achieve faster loading times, enhanced security, and improved scalability for your website.
And by following this guide, you can migrate your WordPress website to a Cloudways server with minimal downtime, giving your visitors an uninterrupted experience.
Remember to test your website to ensure everything is working properly before you remove your old website.
Read also:
Cloudways Features And Add-Ons.
Cloudways Server Management.