Vultr has no one-click option to switch server locations for a server you already created, but it’s possible using Snapshots or Backups.
This can be done by cloning your server, creating another server with the data center you want, and then moving the cloned server files to the new server.
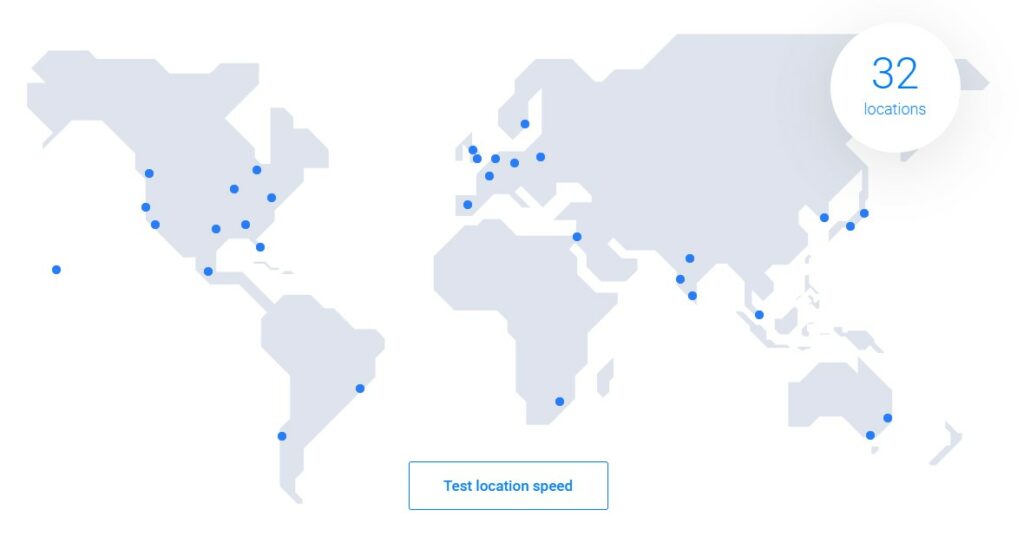
Vultr Server Locations (Datacenters)
Vultr is one of the leading cloud hosting solutions on the internet that offers high performance and reliability at a low price.
Read Vultr review.
With 32 server locations around the world “including Africa”, you can easily deploy your instances anywhere on Earth.
This can lead to more performance and optimizations for your website and, in turn, more customer conversions.
Why Server Location is Important?
When a user makes a decision to see a web page on your website, the request goes to the server, and then the server returns the result.
The longer the distance between the server and the user, the longer time it takes to load the frontend result for the user.
In other words, if the server is very far from your potential customers, this can make the website load slower for them.
The delay usually is less than one second. But, it can lead to bad user experience and search engine ranking issues.
How to Choose the Best Server Location?
You need to create your server in the closest data center to your potential customers.
This has nothing to do with your location. Rather, your website’s server location.
For example, if you are in Singapore, but you are targeting Indian users, in a specific city, select the nearest server location to that city.
Change Vultr Server Location
You can do the server location switching process using Backups or Snapshots.
Here are the steps you need to follow in order to change the server location on Vultr:
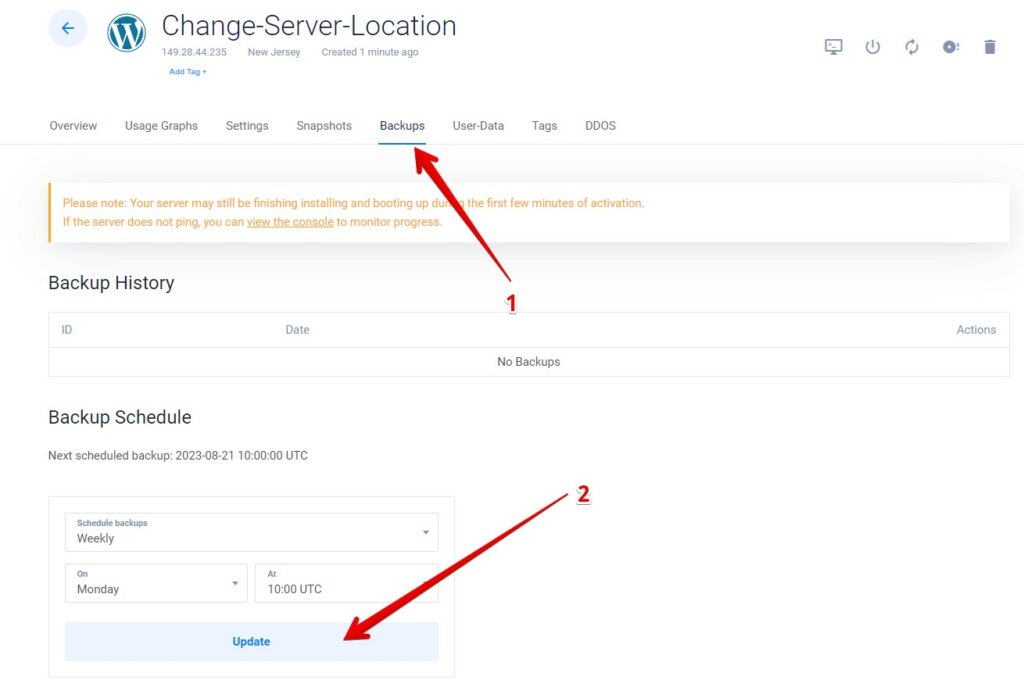
1. Update the existing server backup:
If you want to use the Backups, make sure you updated the backup to the latest changes you made to your server.
Open the server panel, go to Backups, and then click on Update.
If you didn’t enable the server backup before, enable it and then take a backup for the server.
2. Create a snapshot for the existing server:
Using the Snapshots method can also get the job done.
A snapshot on Vultr is a saved image or copy of the server and it costs $0.05/GB per month. I will create one and destroy it later when I’m done.
When you take a snapshot of the server, you simply copy the server files and data into a storage disk.
Go to the targeted server, then go to the Snapshots tab, enter a name, and click Take Snapshot.
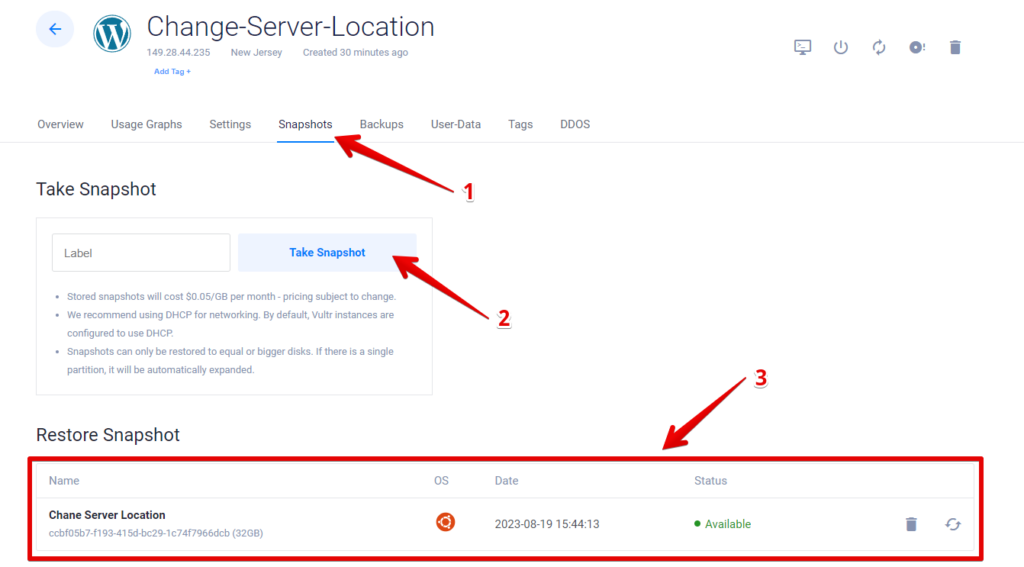
Wait for a while until the snapshot creation finishes.
3. Create an instance with the new server location:
Deploy a new instance as if you want to create another server.
You can select the same existing server resources and options, and you can change some of them.
Go through the process of creating a server.
when you get to the Server Location option, choose the server you wanted.
When you get to the Server Image option, click on either the Backup or Snapshot tab.
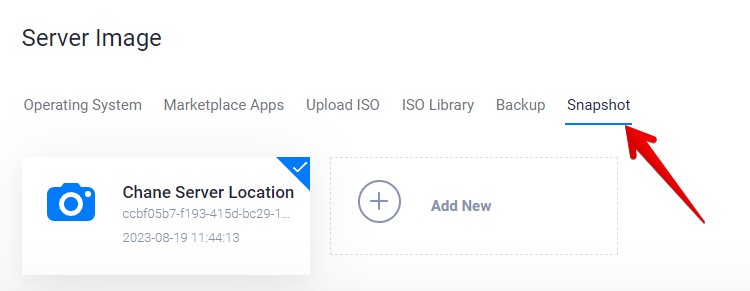
Select the backup or the snapshot and complete the server setup. Finally, click Deploy Now.
Read how to create a server on Vultr with WordPress step by step.
4. Change the domain DNS records:
In this step, you will need to change your domain DNS records to point to your new server.
Copy the IP address of the newly created server and go to where you manage your domain DNS.
Edit any record that holds the old server IP address with the new one. That’s it.

5. Destroy the old server and Snapshot:
Once you checked that everything is perfect and running smoothly, you can destroy the old server and the snapshot.
Go to the server and click Server Destroy, then click on the checkbox and click Destroy Server.
To delete the snapshot go to Orchestration drop-down menu, then select Snapshots.
click on the Trash icon and then click on the Remove Snapshot button.
Conclusion:
A closer data center to your website customers improves its performance.
While Vultr does not offer a one-click option to switch server locations for an existing server, you can still change your Vultr instance server location using the Backup or Snapshot method.