You launched a new website on Cloudways and now you want to connect your domain name to the website you created.
This tutorial will help you manage your domain names on Cloudways, it’ll walk you through the following:
- Add your domain name to your Cloudways application/website.
- Point your domain name to your server IP address.
- Install a free SSL certificate from Let’s Encrypt.
- Change an existing domain name to a new one.
This tutorial assumes that you already have created an app on a Cloudways server and a domain name registered elsewhere since Cloudways doesn’t offer domain name registration.
If you have not yet registered with Cloudways, you can use this link to get $25 free credit for new users.
If you don’t have a domain name yet, you can get one from NameCheap, a reliable domain name registrar.
1. Add your Domain to the Cloudways App
The first step you would need to do is to add your domain name to the website you created on Cloudways.
Go to the Cloudways platform, login to your account, and then to the application that you want to add the domain name for.
From the Application Management panel on the left side, go down to Domain Management to open the domain settings page.
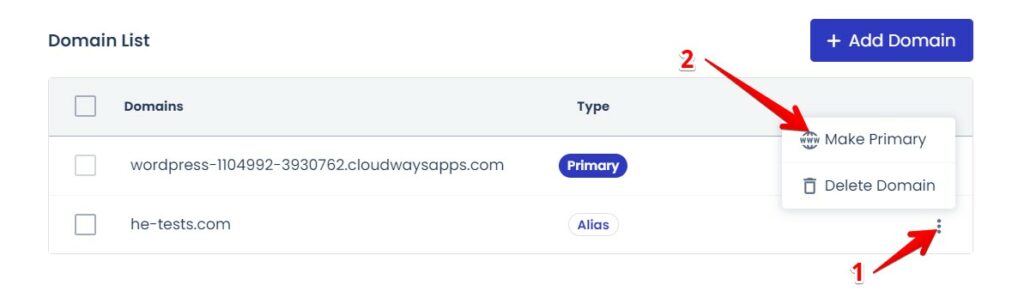
You will immediately see the domain alias set by Cloudways as the primary domain for your site.
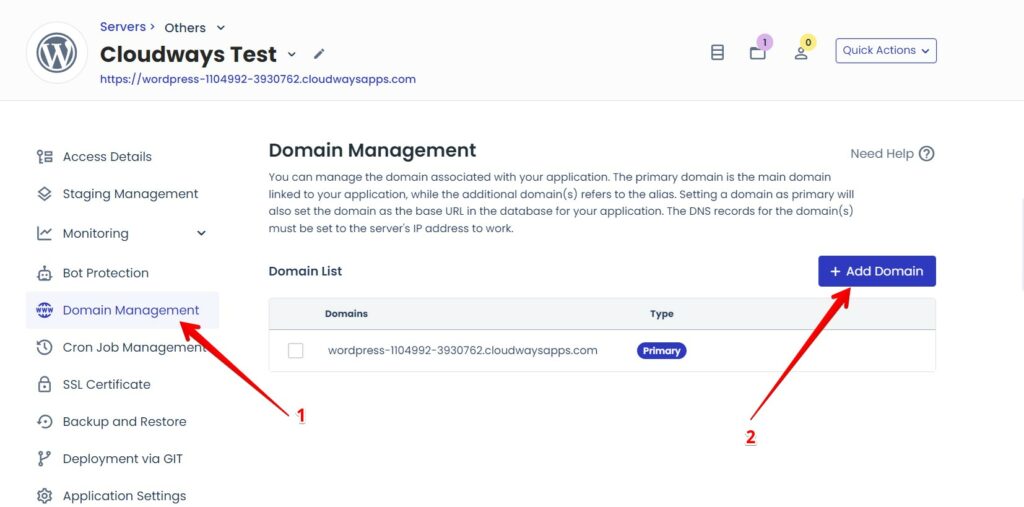
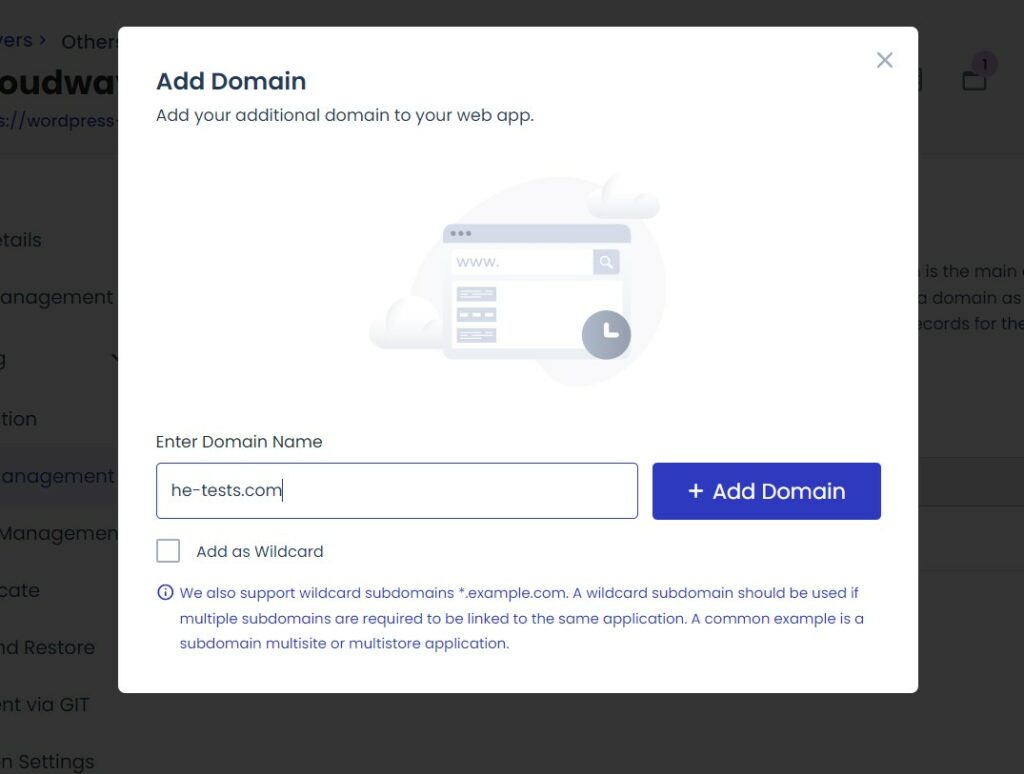
To add your domain name click on Add Domain. This will open up a window where you will add your domain and click on the Add Domain button again. This should be done in no time.
The domain name will be added as an alias Now you need to make it the Primary domain of your site.
Click on the vertical three dots beside the domain you added, and then click on Make Primary. Wait for a while, until the Primary indication moves to your domain name.
2. Point Your Domain to Your IP Address
An Internet Protocol (IP Address) is a string of unique numbers assigned to websites and servers Used to send and retrieve data from specific devices connected to the Internet.
Without pointing your domain to your IP address, your website’s data won’t be accessible through the domain.
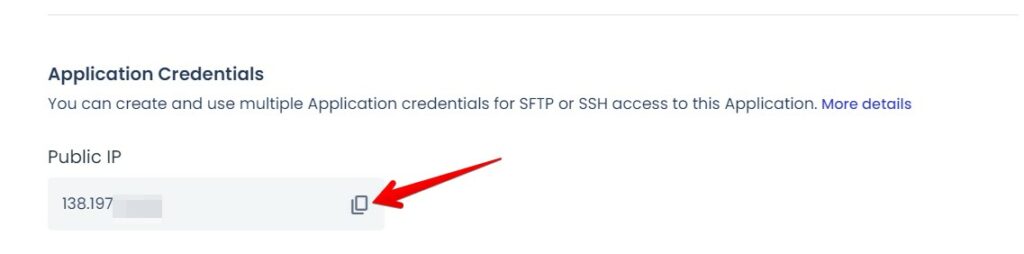
To point your domain name to your site, you need to add the Public IP address of your server to your domain DNS records.
To get your IP address go to Access Details on Domain Management. Scroll down to Application Credentials and copy the Public IP.
Next, go to where you host your domain name; your domain DNS settings, and add an “A” record.
The “A” record maps a domain name to the IP address. In other words, the “A” record tells your domain name that this IP address is the targeted one. So whenever someone clicks on your domain name, he will be directed to your website.
Here are examples from popular domain registrars and managers—Cloudflare, NameCheap, and GoDaddy—on how to point a domain name to an IP address.
Example 1: Point Domain On Cloudflare
To edit your domain DNS records on Cloudflare, click here to go to their platform and log in to your account.
Next, select the targeted domain name that you want to point to Cloudways and click on the DNS in the left sidebar.

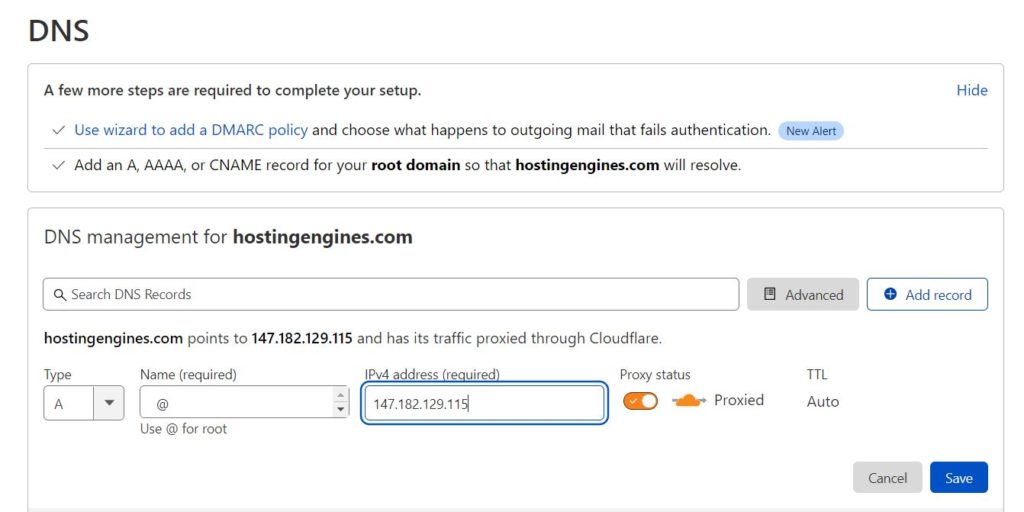
To add the A record, on your domain DNS:
- click on Add record and choose the “A” record.
- In the name field type in the “@” sign.
- In the IP Address field, paste the IP address of your server that you copied earlier.
- Leave the TTL option auto as it is and click Save.
If an “A” record already exists, you cannot add another. Instead, modify the current one in the same manner as adding a new one.
Wait a few seconds to let the changes propagate, and then you can see that your domain name has been assigned to your website (application) on Cloudways.
Example 2: Point Domain On NameCheap:
To point your domain name on NameCheap click here to go to their platform and log in to your account.
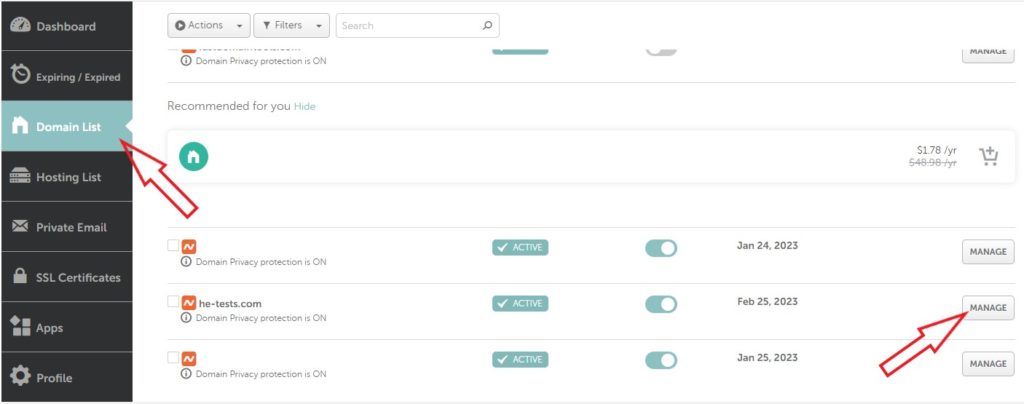
Once you are in there, in the left sidebar click Domain List to go to your domain lists. Next, on the right side of your targeted domain, click the Manage button.
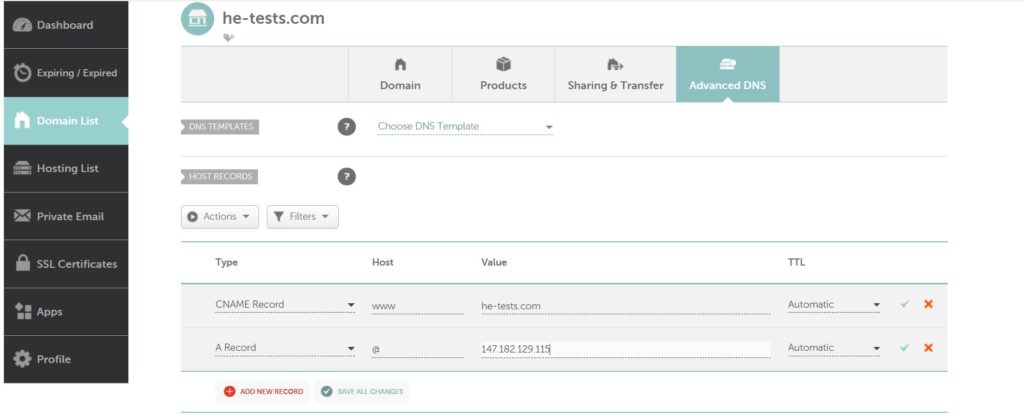
Click Advanced DNS, and scroll down
- Click on ADD NEW RECORD and choose to add an “A” record.
- In the host field, add the “@” sign.
- In the value add your server IP address.
- Finally, hit the checkmark on the right side to save your settings.
If an “A” record already exists, modify it in the same manner as adding a new one and wait a few seconds to let the changes propagate.
Example 3: Point Domain On GoDaddy:
To point your domain name on GoDaddy click here to go to their platform and log in to your account.
Next, go to your Products on GoDaddy or where your domain name is and click on the three dots to open the domain name settings, then click on Manage DNS.

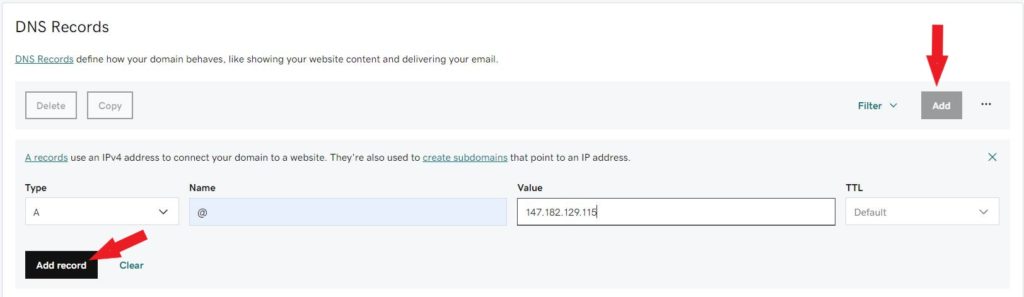
In the DNS record:
- Click Add, and choose the type “A” record.
- Put the “@” sign in the Name field.
- Put tje IP address in the Value field.
- Click Add record to save the changes.
Again, if the A record already exists, you can’t add a new one. Just edit the new one and you are good to go.
3. Install a Free SSL Certificate
An SSL certificate is a digital certificate that provides security for websites and online communications. It makes your website look legit and secure for users.
Cloudways offers to install a free SSL certificate from Let’s Encrypt or upload your own custom SSL certificate.
This step can not be done before you point your domain name to the IP address of your website server and it’s fully propagated.
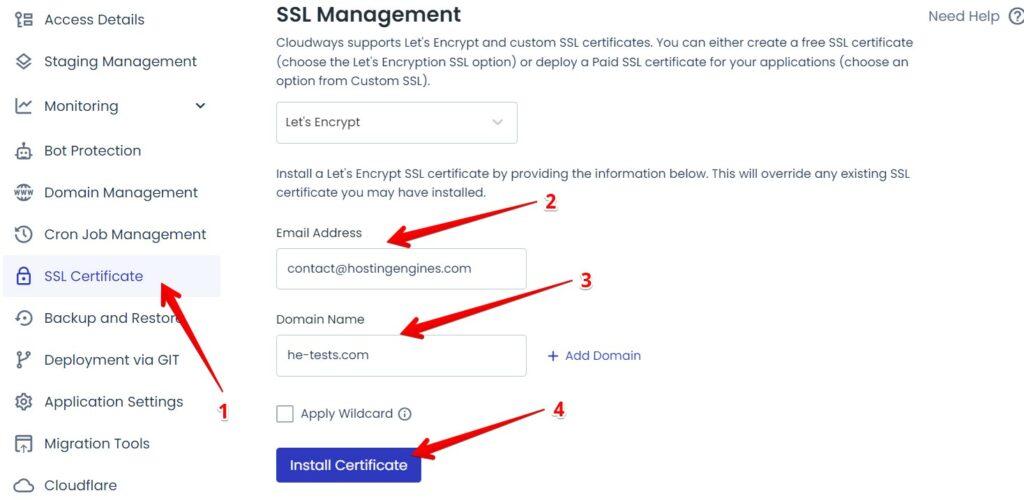
To install the Let’s Encrypt free SSL certificate go to the SSL Certificate tab on the left side bar in the Application Management panel and add an email address and your domain name.
- In the ‘Email Address‘ field, enter the email address where you want to be notified when the SSL certificate expires, so you can renew it.
- In the Domain Name field, type in your domain name.
Finally, Click on Install Certificate, wait a few seconds and that’s it. Your website is now secure.
Change Cloudways Website Domain Name
The process of changing a domain name for a Cloudways application/website is the same as adding a new domain.
So if you want to change your existing domain name to another one, follow the steps below:
- First: Remove the existing domain name with the new one from Domain Management.
- Second: Make the new domain a Primary.
- Third: Update the DNS records of your new domain name by adding the IP address of your website’s server to the A record.
- Fourth: Install the SSL certificate to the new domain name from the SSL certificate tab.
Conclusion
Setting up your domain on Cloudways has never been easier, it’s just a few steps to get your domain name connected to your site. By following these steps, your website will be set up, accessible, and secure.
Firstly, you need to add your domain to the Cloudways app, making sure to set it as the primary domain.
Secondly, for your website to be accessible via the domain, you must point your domain to the IP address of your Cloudways server. This is achieved by adding an “A” record in your domain DNS settings. The article provides examples of popular domain registrars like Cloudflare, NameCheap, and GoDaddy.
Lastly, to secure your website, Cloudways offers the option to install a free SSL certificate from Let’s Encrypt.
Read also:
Install PHP on Cloudways.
Upgrade Cloudways Server PHP Version.
why Cloudways is the best.
Cloudways Features And Add-Ons.
How to Attach Block Storage to Cloudways Server.