Cloudways is a cloud-managed web hosting company that provides reliable, fast, and cheap web hosting services for all kinds of websites. Read Cloudways review.
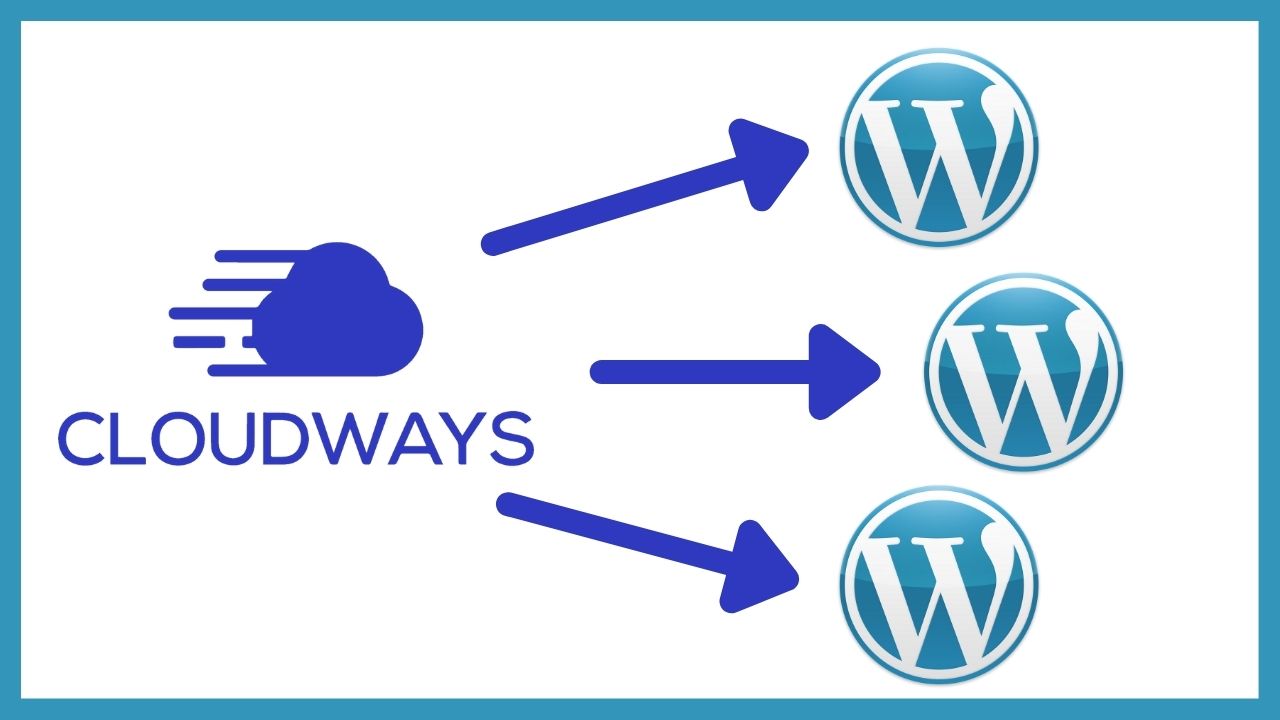
It gives the option to easily host and manage multiple websites on one server. You pay only for the server resources you consume, and you can host unlimited websites on it, as much as the server resources can handle.
Step 1: Sign up for Cloudways
To register to Cloudways go to Cloudways.com and click on start here to sign up for Cloudways. Enter the required information to sign up and then click Start Free. Or sign up with Google, Linkedin, or GitHub accounts.
For first users, Cloudways offers a free 3-day trial to test their services before upgrading to premium.
After you sign up, you need to verify your email address. Also, verify your phone number after you add it. Once you do all that, you are ready to deploy the server and host multiple websites on Cloudways.
Step 2: Create a Server
To host multiple websites on Cloudways you first need to have a server hosted on any of Cloudway’s partners.
1. Add application and server details:
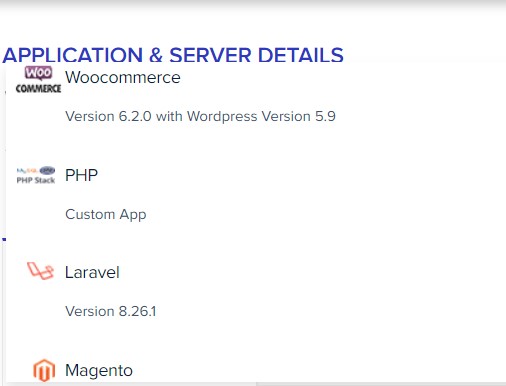
Cloudways supports a variety of CMS, E-commerce, and other PHP web applications such as WordPress, Magento, PHP, OpenCart, Drupal, and Joomla. You just need to select the one you want to install, and it will be installed automatically.
When you want to deploy a server for the first time, Cloudways requires you to create your first application along with the server. That’s why you need to enter the server details and the application details as well.
Firstly, under the Application and Server Details, choose the type of application you want. Click the small arrow to see all the applications available on Cloudways. If you want to host a WordPress website, choose WordPress from the list.
Next, under Name Your Managed App, add a name to your website so that you can recognize it later on when you host multiple websites on Cloudways.
After that, under Name Your Managed Server, name the server that you want to create.
At last, add the project name. The Projects are just for categorizing your application. You can change any of these names later on.
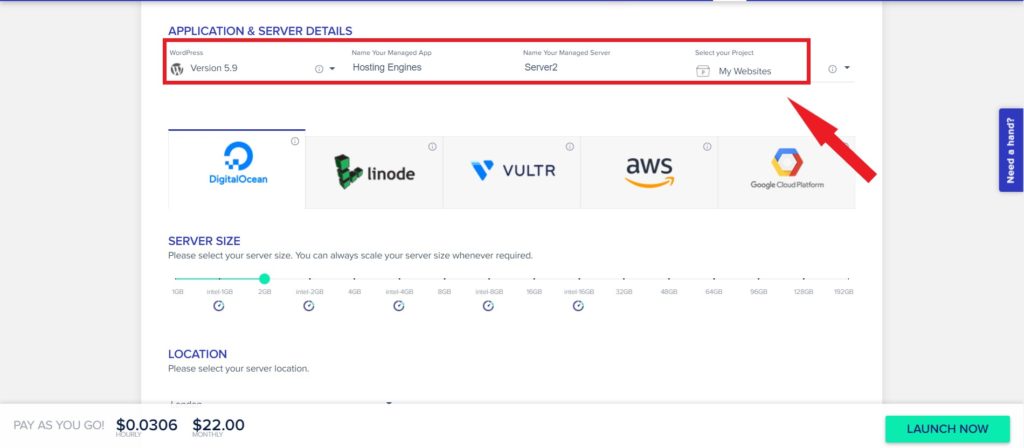
2. Choose a Cloudways partner:
The next step is to choose a Cloudways partner.
Cloudways have partnered with cloud-leading Technology Providers to host your websites on their servers. These companies are DigitalOcean, Linode, Vultr, Amazon Web Services, And Google Cloud Platform.
These companies provide un-manged web hosting technology. Cloudways work as a third party with them to deliver managed cloud hosting for you.
You will notice that the price differs from one to another when you navigate between them. Choose any of them as your server place and proceed to the next step.
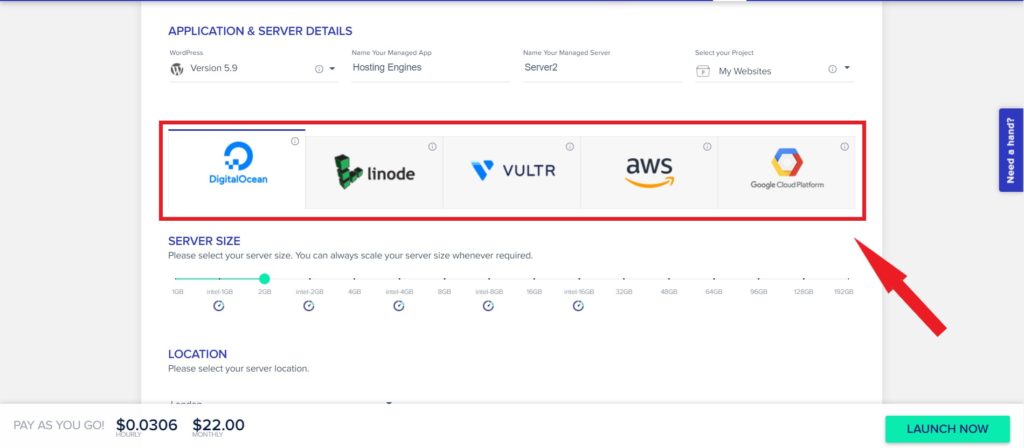
3. Choose the server size:
From there you can determine the size and resources of the server you want to create. Each one of these companies has its own plans with different resources and prices.
The resources of the server are RAMs, CPUs, Networks, Storage, etc. When you increase the server size, the server price per month increases.
The cheapest plan $10/month is quite enough for new and small websites. Also, You can always scale your server size whenever your websites need more resources.

4. Select the server location:
The last thing to do before launching the server is to select your server location. Each web hosting provider of the five has different data centers in different countries.
Select the closest server location for your visitors and client, this will impact the performance of your websites.
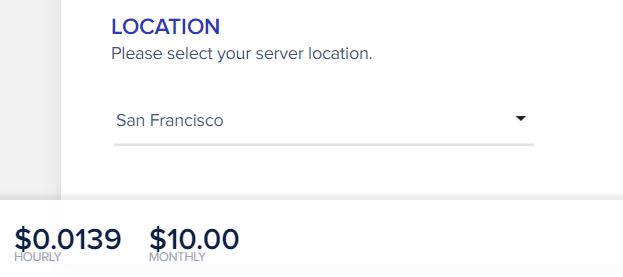
After you choose the server location, click on Launch Now to deploy your server. Once you do that wait 7 minutes and the server will be deployed and ready to host your websites on it.
Step 3: Add Multiple Websites
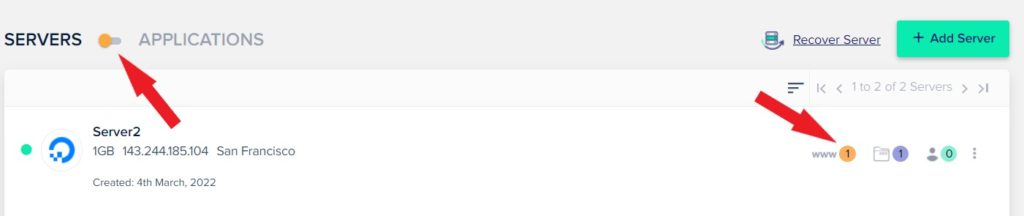
Now the server has been created, and one website has been created along with the server creation.
To see the websites the server hosts, click the toggle on the upper left side to switch between the servers and applications. Or click the “www” to see all applications (websites) hosted on that server.
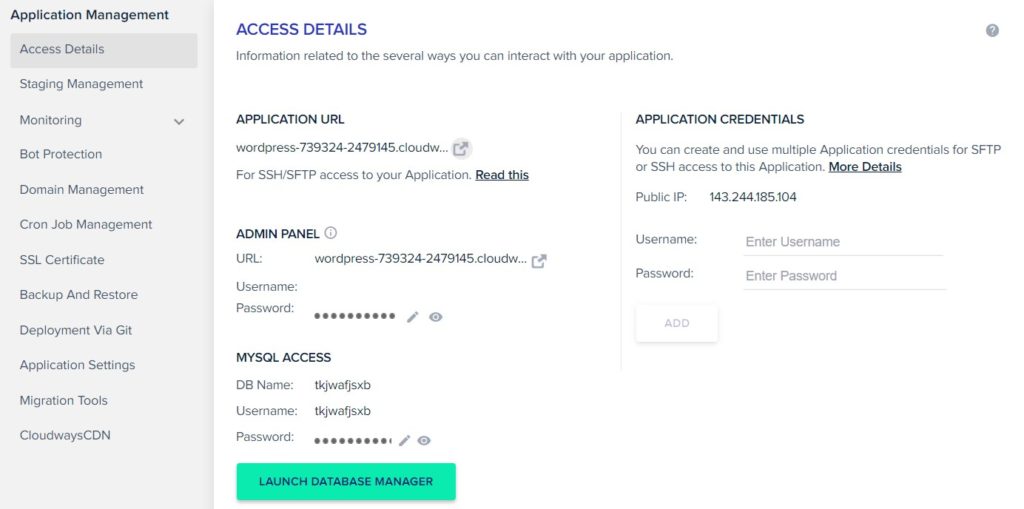
The image below shows the application we created, let’s have a quick look at its dashboard.
- On the left side is Application Management, where you can find all the settings you want to configure your application.
- In the middle are the Access Details, access details to your application, and access details to your application admin panel.
- On the right side are the Application Credentials, the application IP address, and the SSH and FTP credentials.
That being said, here are the steps of how to host multiple websites on Cloudways on one server.
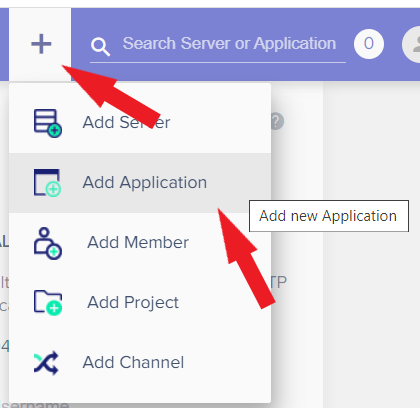
1. Add applications:
There are several applications you can install on any Cloudways server such as PHP and Magento. Like WordPress itself.
To do that click on the plus sign on the upper part of the dashboard. This will open a small window where you can add a server, app, or member. From there click Add Application.
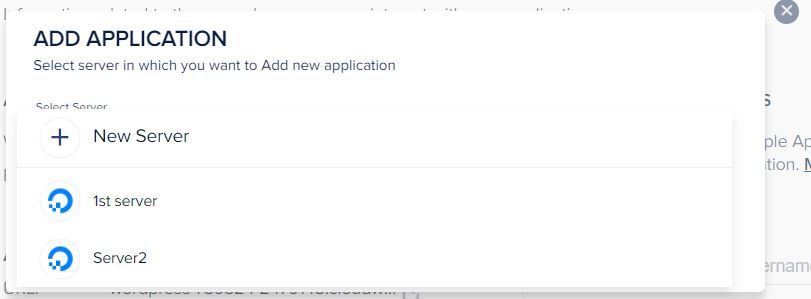
2. Select a server:
A window that tells you to select a server to which you want to add a new application will pop up after you click on Add Application. Choose the server that you want to create your website on and click Add Application.
3. Add application details:
The next step is to add your application details. First, choose the application type. In my case I’ll choose WordPress, but you can choose any application Cloudways provides.
Then type in the name of the application you want to create and click Add Application.
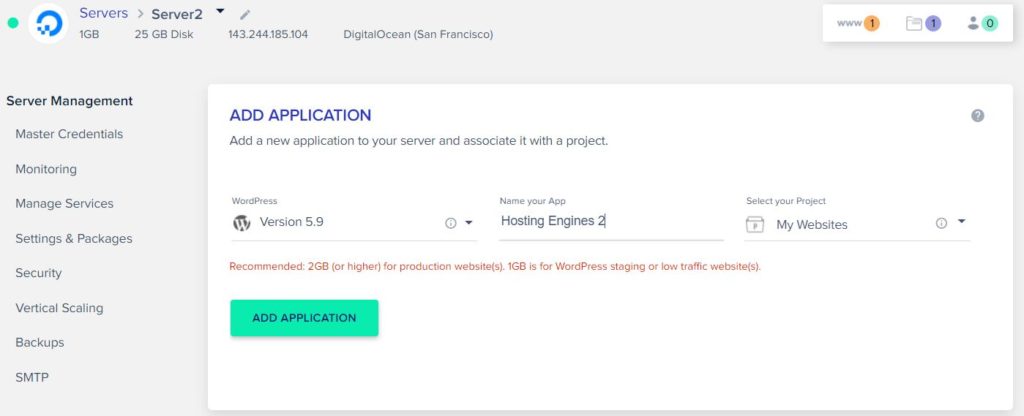
It may take up to 2 minutes in order for your application to be created. Once you create your application, you can navigate to its control panel and start editing and configuring.
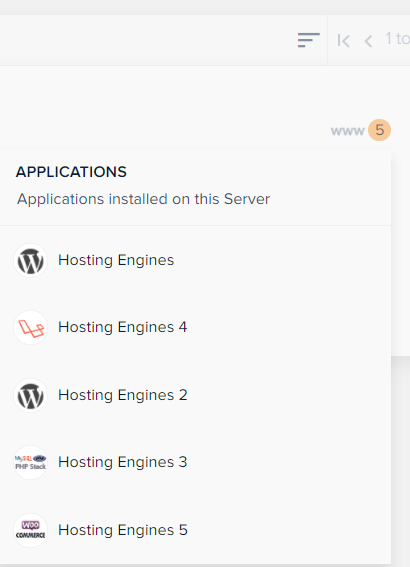
this is how we created the second application on one server on Cloudways. You can follow the same steps to create new ones again. Read how to create a website on Cloudways in detail.
Read how to connect a domain to the Cloudways website and install an SSL certificate for it.