For just $1/month per mailbox with unlimited aliases, you can get your own business email like ([email protected]) to send and receive email on Cloudways using their Rackspace Email Add-on.
Cloudways has partnered with Rackspace technology to offer its reliable Rackspace email service. Rackspace Email is an affordable, business-class email hosting solution with anytime, anywhere access and a 100% uptime guarantee.
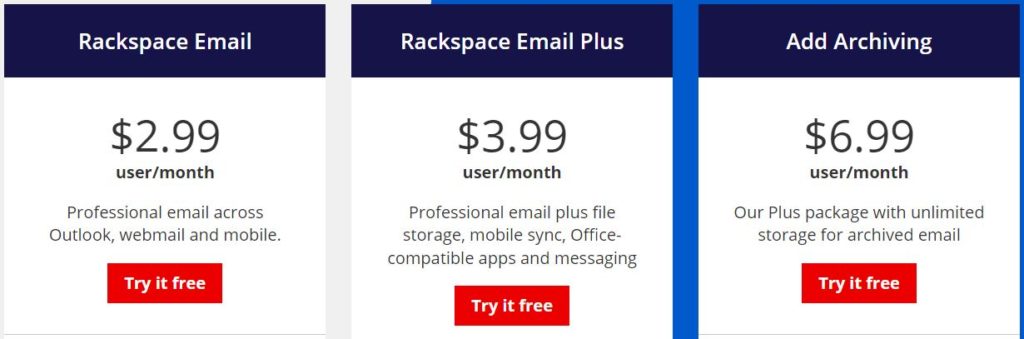
Cloudways Rackspace Email costs $1 every month, while in the Rackspace platform, the cheapest email plan costs $2.99/month. And you will get all the features that Rackspace offers for their clients.
By the end of this tutorial, you will be able to send and receive emails on your Rackspace mailbox using the Rackspace addon on Cloudways.
Read also: Cloudways features and add-ons
Step 1: Activate Rackspace Email
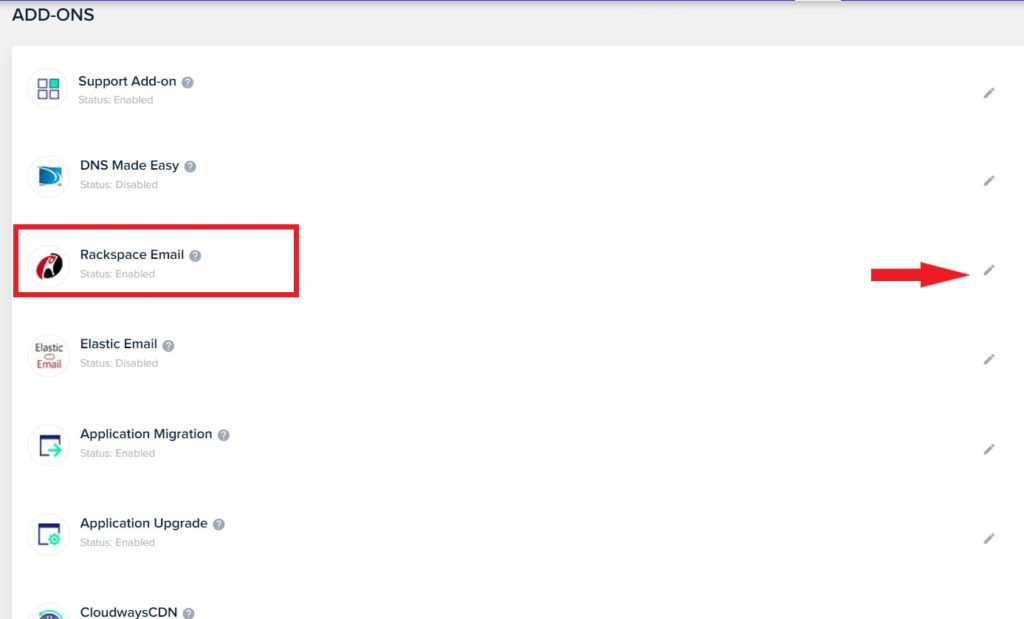
Log into your Cloudways account and click the menu icon in the top menu bar. From there select Add-ons.
This will take you to the Addons page, where you will find all Cloudways addons including Rackspace Add-on.
Next, click the pen edit icon on the right side of the Rackspace addon to start setting up the Rackspace mailbox.
Step 2: Setup Rackspace Mailbox
Once you click on the edit icon, the Rackspace Email window will pop up. In this window, you will see all the features and options that Rackspace provides on the Cloudways platform. And you can add as many mailboxes as you want.
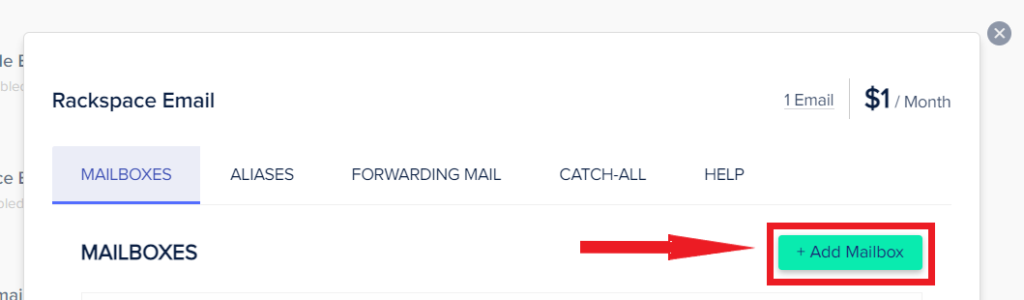
Let’s start by adding your first mailbox. Click Add Mailbox.
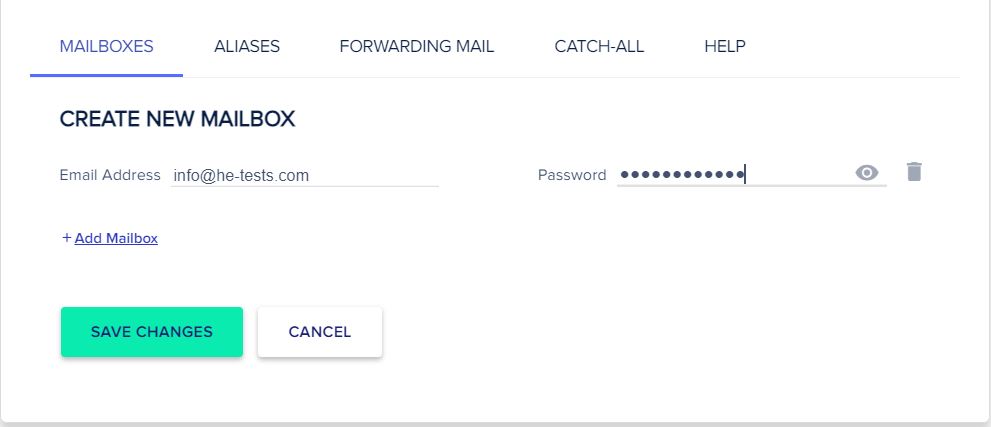
In the next window add your business emails ([email protected]) and add a password for the mailbox. Then click Save Changes.
The password should contain at least eight characters including a combination of uppercase, lowercase characters, and a number.
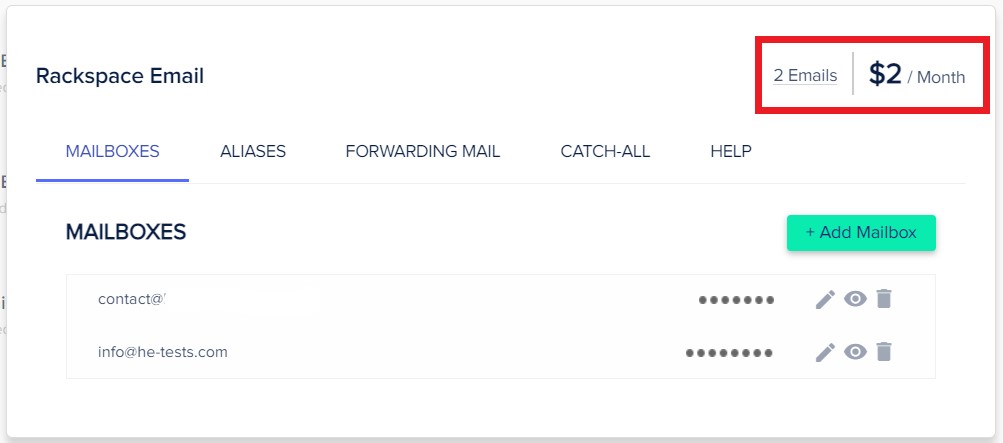
If you created 3 business email aliases for the same domain name ([email protected], [email protected], and [email protected]), it will only cost you $1/month. But if you made 3 mailboxes for three different emails, it will cost you $3/month.
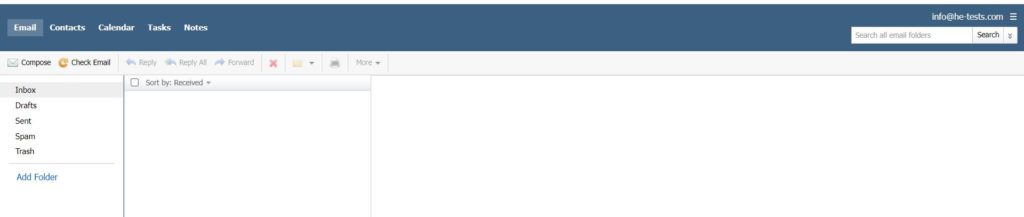
Now you can log in to your mailbox on Rackspace using the credentials you just created.
Go to “cloudways.mymailsrvr.com“, enter your business email you just created and your password, then click Log In.
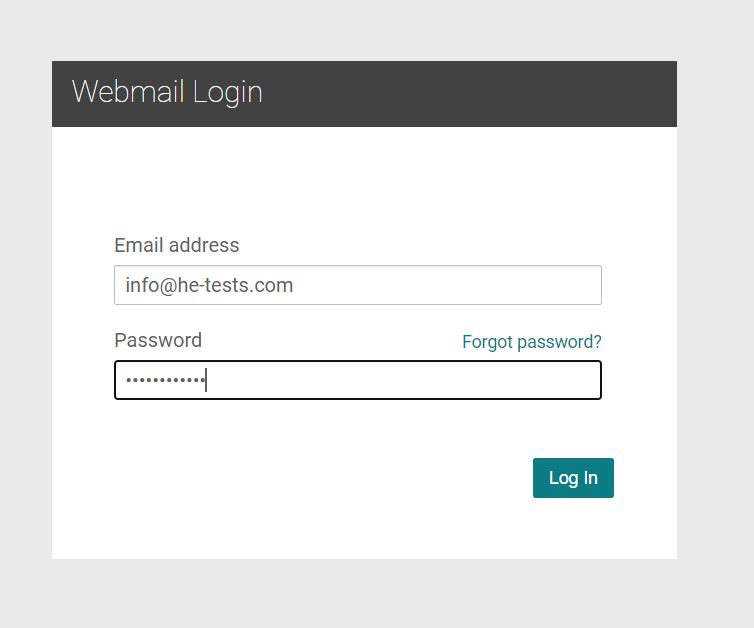
When you do that, you will be logged into your Rackspace mailbox. where you will be able to send, receive, and manage your emails.
Step 3: Add DNS Records to Your Domain
Your mailbox has been created, but it’s not yet eligible for sending and receiving emails. To start sending and receiving emails you will have to add records to your domain’s DNS.
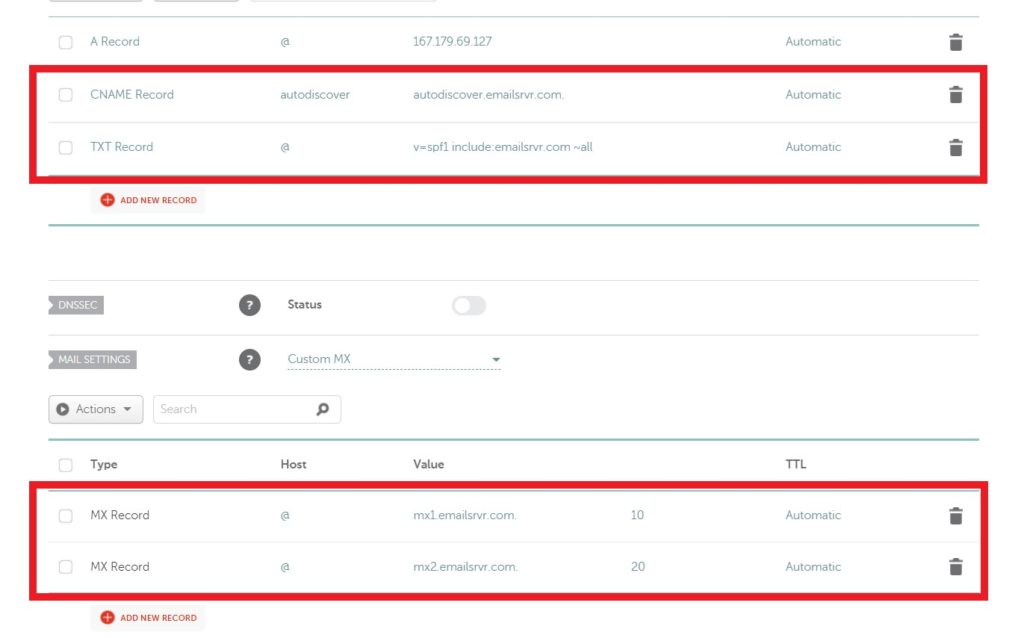
These records are:
- MX records: specify a mail server responsible for accepting messages addressed to your domain.
- TXT record: to check for domain-specific policies such as SPF, DKIM, and DMARC. to reduce unwanted SPAM and spoofing from your domain and ensure that outgoing emails are delivered.
- CNAME record: Canonical Name (CNAME) records specify that a domain name is an alias for another domain.
To configure your DNS records go to your domain hosting platform > your domain name > your domain name DNS settings and add the Rackspace DNS records below to your domain DNS records
| Type | Hostname | Destination | Priority | TTL |
|---|---|---|---|---|
| MX | @ or left blank | mx1.emailsrvr.com | 10 | 3600 seconds or lowest allowed |
| MX | @ or left blank | mx2.emailsrvr.com | 20 | 3600 seconds or lowest allowed |
| TXT | @ or left blank | v=spf1 include:emailsrvr.com ~all | NA | 3600 seconds or lowest allowed |
| CNAME | autodiscover | autodiscover.emailsrvr.com | NA | 3600 seconds or lowest allowed |
Now you have successfully set up your DNS for your domain, and your mailbox is ready to send and receive emails. Your new settings should work instantly. But in some cases, it may take up to 24 hours to propagate.
Read also: Point domain name to Cloudways website.
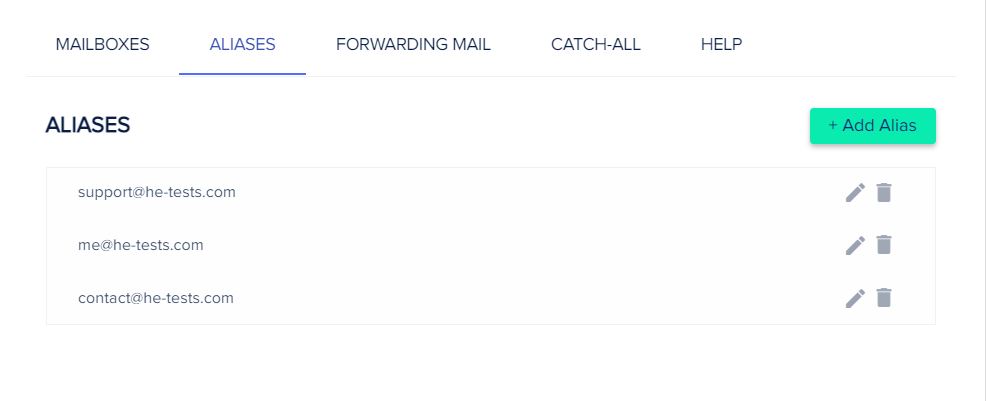
Step 4: Create Aliases
Aliases allow you to create additional email addresses that point to existing mailboxes, without having to create separate mailboxes or paying more money.
For example, if you made a business email ([email protected]), you can make ([email protected]) and/or ([email protected]), etc, without having separate mailboxes or paying extra money.
To create Aliases connected to your domain name go to Cloudways Rackspace add-on and click the edit icon to open the Rackspace settings window, then click on the ALIASES tab.
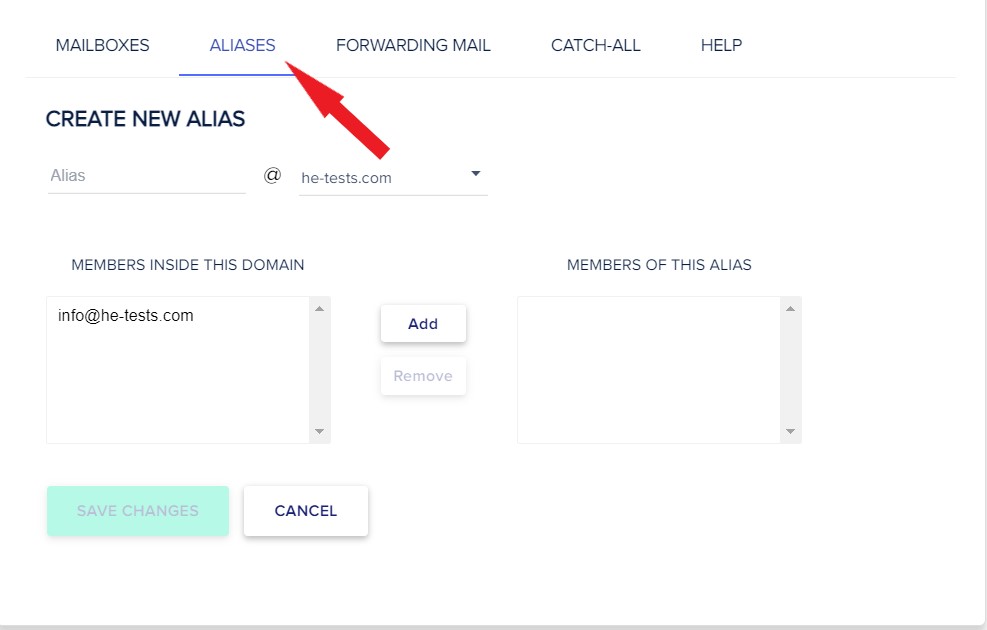
From there, enter the Alias you want to create and select the domain from the dropdown menu.
Next, select the main email address that you want the Alias to connect with, click Add and then Save Changes.
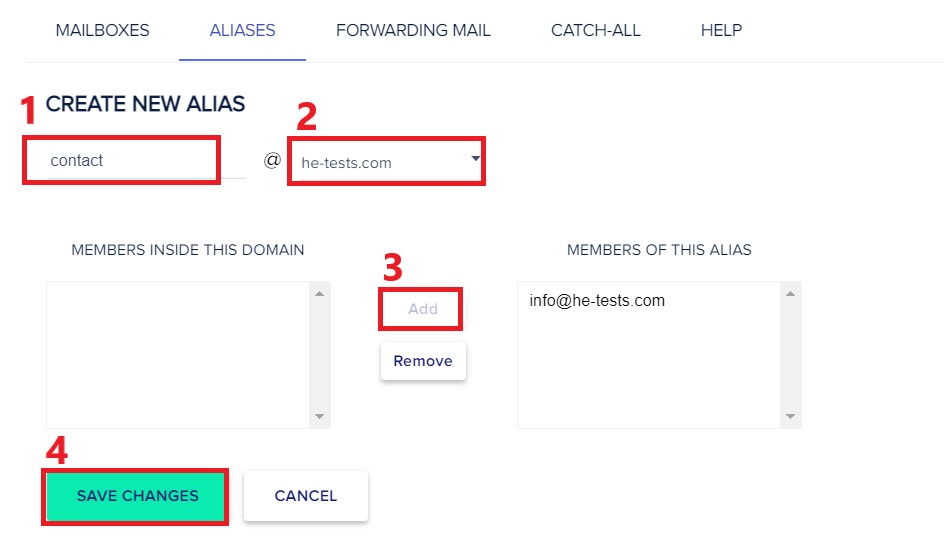
You can create as many aliases as you need, just repeat this process again whenever you want to create a new Alias.
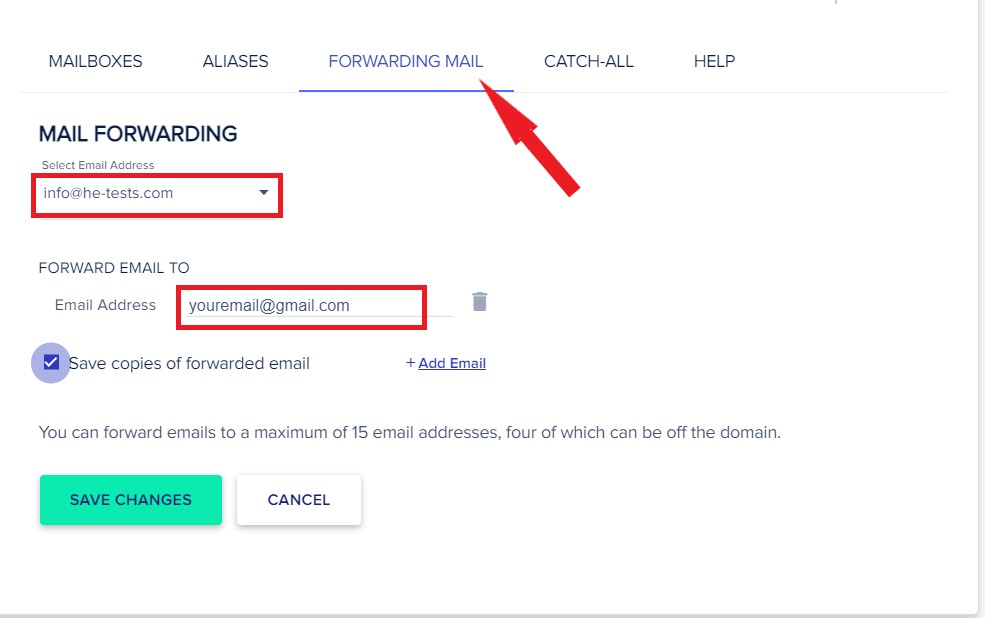
Step 5: Setting up a Forwarding Mail
With this Cloudways Rackspace feature, you can forward emails from your Rackspace mailbox to any other mailbox such as Gmail.
To set up mail forwarding, go to the Forwarding Mail tab and click ad Forwarding.
Next, select the mailbox that you want the emails to be forwarded from it from the drop-down menu. Next enter the email address where you want to forward the emails.
If you want to save copies of the forwarded emails on the mailbox, click on the Save copies of forwarding emails checkbox.
If you want to add another mail forwarding, click Add Email. Finally, click Save Changes.
Rackspace email is a reliable email service, and with Cloudways it’s even better. You can manage your websites and your emails on the same platform.